I have too many meetings at work. (But that’s a topic for another day.) And I take very detailed notes during each one so I have a running history of our project I can refer back to, so I know what’s expected of our team, and what we expect from the other groups we work closely with.
There’s nothing unique about that. It’s just meeting notes.
But what I want to share today are two quick iOS Shortcuts I use to prepare for each meeting.
Almost every single note I take – whether it’s a throwaway idea, a reminder, the beginning of a blog post, or meeting notes – starts in Drafts. If whatever I’ve written ends up just being temporary, it says in Drafts and I archive it when done.
But anything else that may need to be referenced again in the future gets moved into Ulysses for permanent storage or final editing.
All of the meeting notes I take and keep in Ulysses follow a standard format that makes them easy to find, reference, and work from. Here’s an example:
# 2020-05-22 Dev questions with Product team about new feature 2:30pm

Johnny Appleseed
Tyler Hall
Bob Costas
x Tom Waits
Bonnie Raitt
x Michael Stipe
Leroi Moore

## Prep Thoughts

- Question 1 is about something something we need to have this and this defined before we can begin.

- How is this UI thing supposed to animate under this condition?

- etc

- etc

Have they considered that the fidget doodad might not correlate to the blippy bob when the furnitzer does its thing?

## Notes

BC said jumble pony will contaminate the water on 2020-07-10.

https://link.to/prototype-screens

BR promised final copy and translations by EOD Tuesday.

Lorem ipsum dolor sit amet, consectetur adipiscing elit, sed do eiusmod tempor incididunt ut labore et dolore magna aliqua. Ut enim ad minim veniam, quis nostrud exercitation ullamco laboris nisi ut aliquip ex ea commodo consequat. Duis aute irure dolor in reprehenderit in voluptate velit esse cillum dolore eu fugiat nulla pariatur. Excepteur sint occaecat cupidatat non proident, sunt in culpa qui officia deserunt mollit anim id est laborum.
It’s a very simple structure written in Markdown that I’ve settled on over the years.
The H1 header is the meeting date in YYYY-MM-DD format followed by the title of the calendar invite and the start time. By always beginning with the date in that format, it
Makes it easy to search/filter for things that happened on a specific day or year/month combination.
Ensures my notes can be sorted chronologically by title (filename) – just in case their creation or modification dates (which I typically sort by) get messed up.
Next up is the list of attendees included on the calendar invite. Once the meeting begins, I put an x next to anyone who didn’t join. If you’ve ever worked with someone who is flakey and/or unreliable (or a professional gas lighter), it can be extraordinarily helpful to have a record of every scheduled meeting they skipped out on. CYA, folks.
The first H2 is a section where I add any thoughts / comments / research I do before the meeting begins that I want to be able to reference or remember to ask questions about.
And, finally, the ## Notes section is just that – the notes I take during the actual meeting – not to be cross-pollinated with the notes I prepare for myself prior to the start.
Anyway, none of that is special. It’s just simple and works for me.
For a long time, I’d have to create a note in the above format for every meeting by hand. Not only that, but I’d have to remember to do it ahead of time or else I’d be stuck scrambling to jot down my thoughts when my calendar alerted me it was time for the meeting to actually start.
Here’s the two iOS Shortcuts that fix that for me.
The first is called “Meeting Template”. When I run it on my phone it
Finds all of my Not All Day events in the next 7 days on my work calendar that don’t include the word standup. (I have a separate folder of notes just for standup logs.)
Presents a menu for me to select one of the events.
Grabs the name of the calendar event
Grabs the event’s start time and date
Gets a list of the invited attendees
Combines all of that info into my standard (empty) note format
Sends the new note to Ulysses and puts it in a specific folder with all of my other work meeting notes.
I’ve added that shortcut to the widget section on my phone’s Today screen (or whatever that left-of-home screen is called), so I can swipe, tap, pick an event, and I’m done.
I almost exclusively take notes on my Mac, so I wish I could run this shortcut on macOS itself, but I always have my phone with me and Ulysses’s cross-device sync is so wonderful the new note is nearly instantly available on my Mac to begin working with.
The last puzzle piece is actually remembering to do any preparation for the meetings that require it. Not every meeting needs hours of research or prototypes built ahead of time, but it’s usually helpful if I do at least give each upcoming meeting a few minutes of thought beforehand.
So I have one more Shortcut that helps me remember to prepare.
Whenever I receive and accept a new work calendar invite, I’ve trained myself to remember to run the following shortcut that
Finds the same set of events as the previous Shortcut.
Prompts me to pick one (usually the meeting that I just accepted).
Asks me how far in advance I’d like to be reminded to prepare.
Adds a new event to my calendar named “Prepare For ‘The Title of the Original Meeting'” scheduled in advance for the amount of time I picked in step 3.
These new events are, literally, reminders and could just as easily be added to Reminders.app, OmniFocus, or your todo app of choice.
But – given how my brain works – I think of them more as dedicated blocks of time that I need to carve out of my schedule to make sure I do the prep work needed.
My todo list, my reminders, even when I assign a due or defer date, still typically remain fluid and can be rearranged (within reason). But calendar events are scheduled, dedicated times to do certain things.
So, for most meetings, I just schedule the reminder an hour or two in advance if there’s any preparation to be done at all. But for other more in-depth meetings where I might need to prepare a demo or diagram to help convey my thoughts visually, those take time and I schedule my reminder event far enough in advance to account for that.
It all started with a nightlight that looked like a snowman and ended up taking 89 lines of JavaScript to make my kids go to sleep.
Like most young children, mine have always slept with a small nightlight that plugs-in directly to the wall outlet. It’s a warm, comforting, not-too-bright glow.
But this past Christmas, my wife’s parents gave them a large, ten inch tall, battery powered, super-bright nightlight that looked like a snowman. My son and daughter were enthralled, and it quickly became irreplaceable and a required part of their bedtime routine.
The problem, like most parents can tell you, is that – I assume for safety and/or liability reasons – most large nightlights are battery powered. There’s no cord plugging into an outlet. And, boy oh boy, was this snowman battery powered. It took three C batteries to light him up. And as parents will also tell you, it’s not good enough to only turn it on at bedtime and then sneak back in the middle of the night to turn the light off to save power. The slim chance that a kid who is now used to sleeping with a bright nightlight will wake up before morning, find themselves in a dark room, and freak out is way worse than having to replace batteries.
But this particular snowman? Two C batteries. Every. Three. Days.
So that lasted until February before we had enough and began looking for a rare, plug-in variety. I quickly learned that non-battery powered nightlights on Amazon fall into three categories:
Sketchy under $10 ones that might as well say “fire hazard” in the product listing.
Lights in the $25 – $40 range that might be OK, but look suspiciously like cheap, dollar store plastic.
Boutique, child-themed, bedroom illumination appliances in the $70 – $200 range.
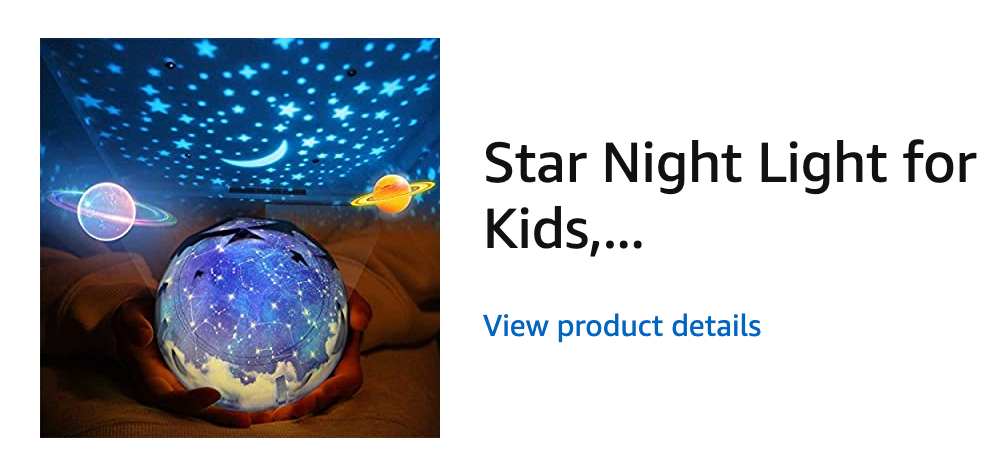
After narrowing down three options in the second group, I let my son make the final decision and he chose a $29 model that promised to project a multi-colored array of rotating constellations on the ceiling. And I should have known better. All of the parent and consumer product review websites that I normally turn to for buying advice all said the same thing: if you want a bright nightlight that plugs in and won’t burn your house down, you might as well pony up for something quality made.
In writing this blog post, I looked up my order so I could show some details about the light. But if it’s any indication of how well it turned out, I’ll just show this screenshot from my order history. That’s all I could get because both the product listing and company are gone from Amazon.
But this isn’t a post about a fly-by-night Amazon seller. This post is about a Saturday afternoon’s JavaScript diversion. Which I’m getting to soon, I swear.
But, quickly: the globe around the light didn’t fit or attach, the inner lid sitting on top of the bulb kept falling off, and it didn’t project a star pattern. But! It did change colors and my kids loved it.
Until it broke. And I fixed it.
And then it broke again. For good.
So for the past three weeks my kids have been back to their old, dim, drugstore-bought nightlight. And if they weren’t falling asleep because of that it would actually be OK. But it’s worse than that. Now, every night when I say goodnight, they whimper and tell me how much they missed their old snowman light. And how much they want a “fun” light to sleep with. Sleepless nights I can deal with. But when the last image of your kids every single night is them genuinely sad – and not even in a whiny, complaining, spoiled type of way – just matter-of-factly sad that a toy they loved is now gone, you as a parent start looking on Amazon all over again.
And I don’t know how I missed it during my first search, but this time my wife sent me a link to Echo Glow.
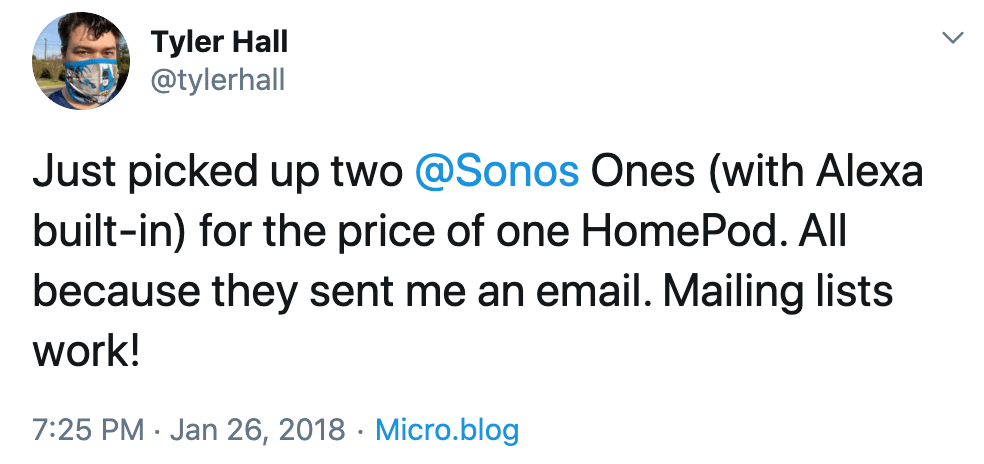
Our family isn’t really in the Google ecosystem, so we’ve never had a Google Assistant smart speaker. And my wife outright loathes Siri. So, when I got to beta test the first Echo, we found a helpful, useful middle ground that we’ve never switched away from. And as a decade-long fan of Sonos, even HomePod couldn’t sway us away from Alexa.
So, for $30 I can get a first-party, plug-in, made-for-kids, Amazon nightlight that looks nice, changes colors, and does all the things you’d expect of a smart bulb? Sold.
Buuuut, obviously, I’ll need an Echo of some sort to control it. We’ve got a few around the house, but there have never been any electronics in the kids’ bedroom. So after running it by my wife, I added a new Echo Dot to our order. Our kids love asking Alexa questions on our existing Echoes. And my son loves exploring new music with his Spotify kids account. (Seriously, Spotify, thank-you so much for making a dedicated kids app.) My plan was they’d love the new nightlight, could have fun controlling it with the Echo Dot, which could also serve double-duty as a replacement for their bedroom sound machine.
Wait? Did I not tell you about their sound machine already? Because that’s where the JavaScript comes in.
My son had colic. As a baby, his crying was so ceaselessly unending that we still refer to those first twelve months as “the dark times”. We eventually found a combination of Baby Merlin’s Magic Sleepsuit (seriously) and white noise that would finally, finally help him fall asleep by 3am. Around the house in his rocker during nap time, he cuddled up to an iPod touch running Swish. (Thanks, Daniel!) And in his room we had a white noise machine made for babies.
And we still have it.
Try as we might, we could never transition him (and now his younger sister) away from it. So, now, six years later, they both fall asleep to the sound of a light forest rain that still gives me anxiety almost as bad as the Slack knock knock brush sound.
So when I swapped out their ancient white noise machine for the new Echo, I naively thought it would be easy to add an Alexa skill to play some rain sounds at night.
Narrator: It wasn’t.
As the parent of a formerly fussy baby, I have exacting requirements. Which means the white noise app:
Must play a gentle rain noise. No thunder. No babbling brook or chirping birds. No rain forest frogs. Just rain.
The sound has to be continuous. If it loops, it can’t have a break while the audio starts over. If that’s not possible, then each loop needs to be long enough that my kids aren’t going to notice.
I don’t want to play twenty questions with Alexa just to get it playing.
Turns out, that’s not how any of the 283 available white noise Alexa skills work.
Once I narrowed down the options to those that didn’t come from obviously shady developers, I started giving them a try. The best was White Noise by TMSOFT, who also happens to make the iOS white noise app I’ve used for years to help me sleep when I’m away from home.
But each Alexa skill had the same problem: the sound would end after an hour or two before they asked you to subscribe for unlimited play time. At first I just assumed this was part of the new wave of everything-is-a-subscription software. Which, as a developer, I totally get – and I’m not opposed at all to paying for an app that helps my kids sleep. But still, a subscription? Not just a one time purchase?
So, I started investigating and finally realized something that makes total sense when you think about it. These Alexa skills are all cloud based. As far as I’m aware, they’re not actually stored on your Echo. And, so, the audio isn’t on the device either. It’s streamed. Every time. And an app that streams eight hours of nighttime audio every night for every customer is quickly going to burn through some bandwidth. And bandwidth isn’t free. And thus the justification for the subscription.
Again, not opposed to paying, but let’s see if I can find another solution that works with what I already have. Could I just…play?…my own rain noise?
I have some old, multi-hour long, rain sound mp3s in my iTunes library dating back to when I used a click-wheel iPod plugged into a bedroom speaker to fall asleep in college. And because they’re in my iTunes library, that means they’re available in iTunes Match. And Alexa can play Apple Music, so…
Nope. Apple Music and only Apple Music – as in the streaming service. Not your real music library in Apple’s cloud.
But, at one point years ago I paid for Amazon’s cloud music storage service and uploaded all of my music to their service for playback. Unfortunately, not only has that service been discontinued, but Alexa won’t play music from the libraries of those of use grandfathered in.
Next up. Spotify. Two problems.
Yes, their catalog does contain lots of rain sounds and other relaxing and white noise “albums”. But, like an album, they’re all just songs. As in mostly 5 – 10 minutes long each – if even that long. I tested a few on repeat just to see how they sounded when looped, but you could clearly hear the gap as playback restarted.
Assuming, I did find a long enough track, Spotify only allows your account to play music on one device at a time. Admittedly, Amazon has done the best at supporting multiple users and families of any of the tech ecosystems, but I still haven’t figured out how to connect multiple Spotify accounts to a device. So every time my kids’ rain starts, that would stop the music I’d otherwise be listening to and vice versa.
Ok, let’s get clever. I pay for YouTube Premium, and YouTube has some absolutely insane users who uploaded hours of lengthy video content. So it took all of thirty seconds to find a suitable eight hour (!!!) YouTube “video” of rain noise.
Sadly, there’s no official YouTube skill for Alexa. I assume because something something tech giants can’t play nice together. And even if the few 3rd party YouTube Alexa apps I found weren’t totally sketchy, I wasn’t ready to hand over access – even if the OAuth permissions were limited.
Finally, I turned to my best friend, Plex. Last year I gave up iTunes Match as well as all the other TV / movie services and just started keeping our content hosted locally. That includes our family music library. And, sure enough, Plex has a nice, officially supported skill for Alexa.
I downloaded the eight hour rain video from YouTube I mentioned above – all 13.87 GB of it. And converted it into a 461 MB mp3. Dropped it into my Plex library, and, boom! Playback success.
Sadly, the Plex skill violates requirement #3. It’s way too verbose to start playing when dealing with sleepy children. Back to the drawing board.
If I may skip ahead to the end quickly, now that I’m writing this and looking back at all the trouble I went through to find a working solution I was happy with, I probably should have saved myself a lot of time and just paid for one of the subscription white noise Alexa apps. But that’s not what a nerd does when they’re faced with an annoying challenge and the opportunity to learn something new.
Instead, I decided it was time to write my own Alexa skill. And so now, 1,985 words deep into this blog post, I get to the point and the part about JavaScript.
All of the existing Alexa skills I tried do too much. Not surprisingly in a competitive market, they try and stand out by competing on features. But as a parent, I just need something that works. And kids are creatures of habit. They want the exact same routine every night. They don’t need a library of 200 white noise options with durations, times, cross fades, or anything else. That’s exactly why, as the parent of a new born six years ago, Swish was on my wife’s home screen. Open the app. Done. No fuss. Nothing to press.
So the goal for my Alexa app was to say an invocation phrase. And. That’s it. No dialog. No choices. Nothing else.
I’m happy to say that after cobbling together a few StackOverflow answers and the Alexa Hello World template, my solution does that. After I finish reading my kids their nightly book, I’ll say
Alexa, start bedtime routine
and she’ll reply
Night, night. Sleep tight. Night, night. I love you.
The new nightlight will start flickering like a campfire at 30% brightness, and that eight hour mp3 of rain noise, hosted on my own web server, will gently stream into my kids’ bedroom
My first pass at making it work just started the audio playing. But I say the above goodnight phrase to my daughter every night when I tuck her in. Actually, she first said it to me about a year ago. And I’ve repeated back it ever since. It only seemed natural to have their new, all knowing, disembodied companion say it as well.
To all the engineers who work on making ecosystems for developers available, open, and hackable, so that I can put together something like this in a couple hours even when I know better and should have just kept their old sound machine plugged in, thank you. And sleep tight.
Technical Notes
The Alexa skill web debugging environment is, how should I put it? Awesome. When you create your project, Amazon spins up a Node lambda environment for you, gives you a mostly comprehensible GUI to set basic parameters, and then a really nice code editor with error checking to write your JavaScript.
Click a few buttons, and everything is built and deployed for testing in under 30 seconds. If the computer you’re working on is near an Echo device that is signed in to the same Amazon developer account, your new dev skill is just available for you to use. No setup needed. If not, you can use their web debugger, which lets you type to Alexa or you can use your browser’s microphone functionality to speak to her like a real device. And if your skill is designed to run on an Echo with a screen, Amazon even displays a preview of the visual output as well.
That’s just the debugger for interacting with Alexa. Before you can do that you first have to speak an invocation phrase to launch your skill. How do you know if what you say will properly trigger Alexa? They have a debugger for that, too. Type an invocation phrase, and Amazon will parse it and tell you which, if any, of your intents match.
And speaking of invocation phrases and intents, a funny thing happened on the way to an AI powered bedtime routine.
I initially tried to launch my skill (and stop playback in the morning) with phrases like “goodnight”, “go to sleep”, “time for bed”, “wake up”, etc.
Much like how Siri (unhelpfully) works with third party apps, Alexa assumed common phrases like those were meant for her and her only. (At least in my testing. Maybe I was doing something wrong?) When I’d try to stop the rain noise by saying “wake up”, Alexa would respond with a cutesy phrase like
Hello. I’m right here.
Similar things would happen with every other phrase I could think of around how you might verbally say goodnight or good morning. Alexa always intercepted the invocation phrase before it got to my app. (Just like if you have ever asked Siri to play music or set a reminder with a non-system app.)
So, sitting at my desk, frustrated because I just want to test the damn thing and at this point I could care less what I say as long as I can find out if my code even works or not, I pick the first random phrase I can think of that can’t possibly be interpreted in any other way.
So, earlier when I said that I told Alexa to run my custom skill by saying
Alexa, start bedtime routine
I lied.
Now that I realize the phrases I was first trying were getting intercepted, I could probably make that one work. But in the heat of the moment when I needed one that would just work, I came up with something else. So, now, when it’s time to say goodnight to my kids, I tell her
Alexa, open a good bottle of Scotch
Anyway, this was my first time ever dipping my toes into the development side of Amazon’s voice ecosystem. And I’m incredibly impressed. Folks can argue about which tech giant has the smartest or most useful voice assistant, but after the deep dive I’ve done on a new product using Siri on iOS the past few months, the difference between Amazon and Apple’s documentation, development and debugging environments are night and day.
This afternoon was a nice break from my normal tech stack and a lot of fun. I’m excited to try a real idea one day, or see how Amazon’s voice model influences the Siri app I’ve been working on.
For the curious, here’s my cobbled together Alexa skill index.js. Apologies to all the Amazon engineers whose API I’ve made a mess of by not reading the documentation carefully enough.
Jeff Johnson is my favorite kind of developer. He’s stubbornly pragmatic in solving the most infuriating types of problems that customers face: The myriad software paper-cuts forced upon us by large corporations trying to squeeze an extra penny of engagement out of every user and the skeezy, underhanded, web developers exploiting our every click.
Of course, these days, you can’t actually just make a browser extension for Safari. You have to bundle it inside an app – even if that app does nothing other than tell you “Hey, dummy. Go open Safari”.
(I think the whole extension app requirement comes from a good place, but not one that was ever fully vetted-out to consider how Pro users – the ones most likely to actually use browser extensions – want to use them. It reminds me of Apple’s early iPhone OS recommendation (requirement?) that third-party apps put their settings in a bundle inside Settings.app. I mean, I get it, I guess. But that’s sort of like opening a System Preferences pane to change the background color of your text editor. I’m glad the platform has moved away from that.)
I digress.
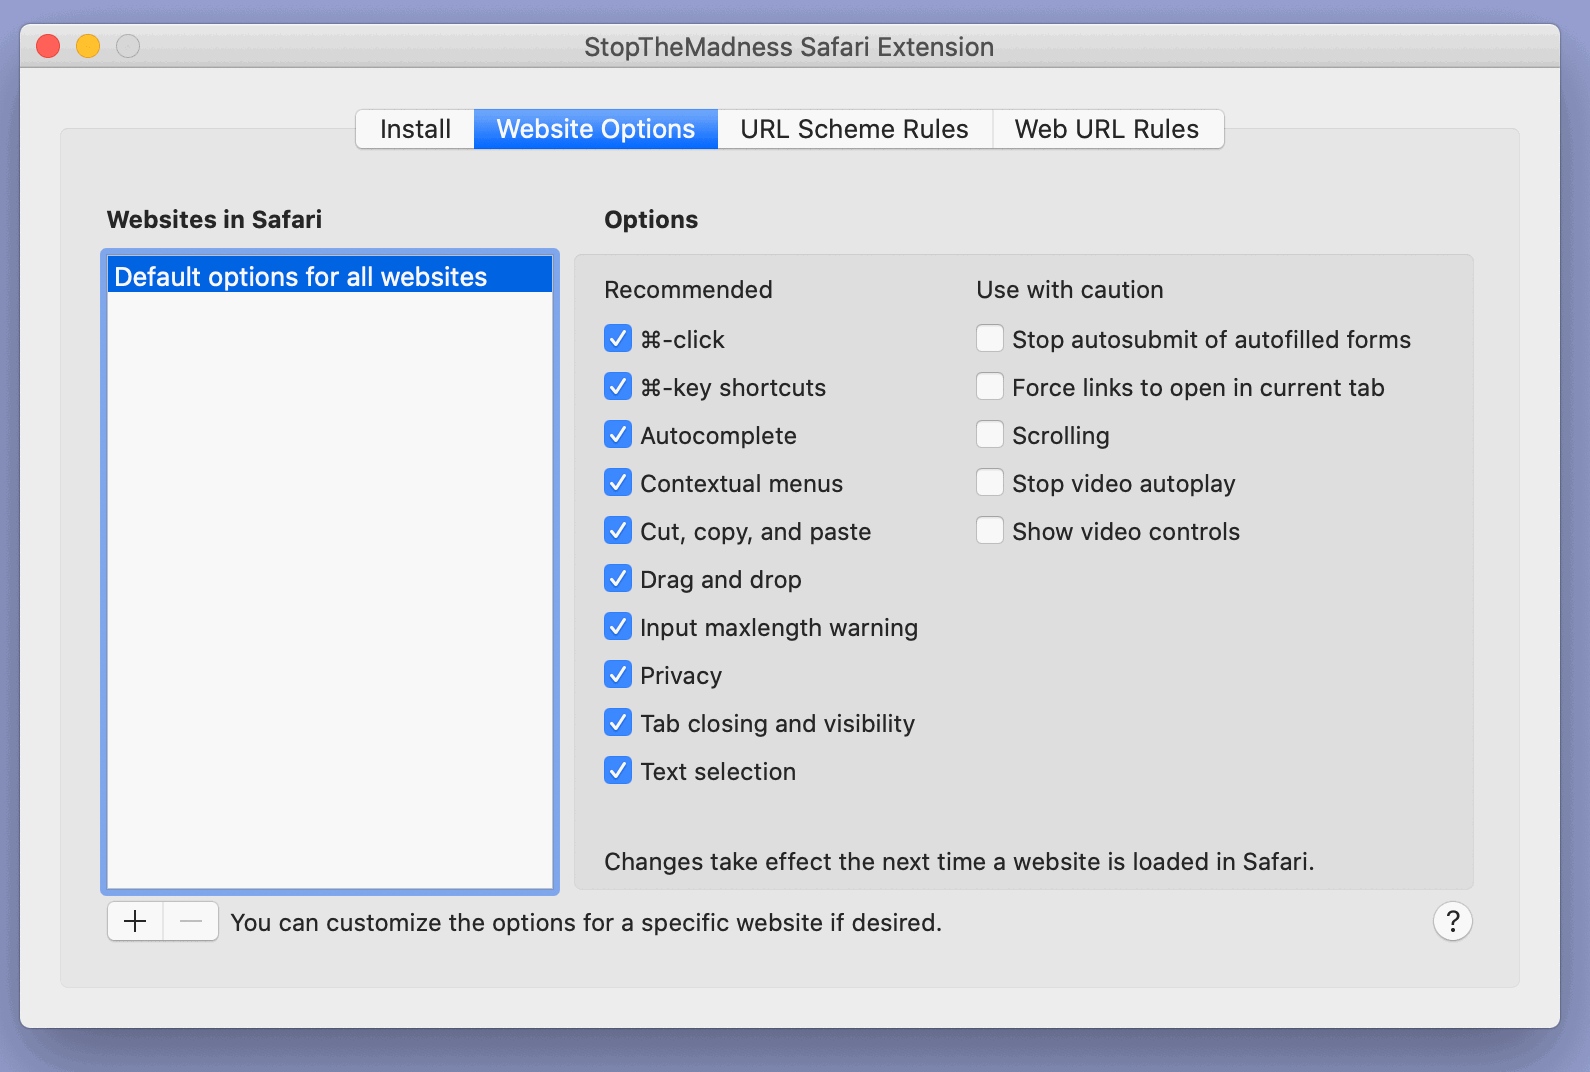
Anyway, StopTheMadness is a browser extension that stops all the dumb websites out there from doing all their dumb things.
Stuff like preventing you from copying and pasting – or pasting specifically into a password field for sEcUriTy reasons. Or disabling contextual menus. Or blocking text selection. The list goes on. All those user-hostile decisions that are typically dictated to a lowly web developer by middle management.
You can enable / disable features globally or on a per-website basis.
You can even configure Jeff’s extension to always open certain websites with a specific browser other than Safari. That’s excellent if you’re like me and prefer to do all of your Google apps in Chrome, while remaining logged out in Safari.
StopTheMadness is a veritable cornucopia smorgasbord of solutions for the web’s worst offenders.
I can hardly believe I’m saying this, but it’s a rare example of JavaScript being used for good. It’s a digital condom for your web browser. (I so, so hope Jeff uses this paragraph as a testimonial on his website ?)
It’s such a great, niche idea for an app aimed squarely at folks who care about their interaction with technology. It’s a perfect fit in line with Apple’s user-focused ethos at a time when so much software prioritizes profits over user experience.
It’s also a brilliant display of brute-force pragmatism to just fucking fix a problem at all costs that was likely bugging him personally, and then organically grew into a full product.
Which leads me to his other app that debuted last May. StopTheNews.
Have you ever been annoyed that Safari on macOS 10.14 Mojave wants to open Apple News articles in News app instead of in Safari? Well no more! I’ve just released a new, free, open source Mac app called StopTheNews that stops Safari from opening Apple News articles in News app. Instead, StopTheNews opens the original article URL in Safari.
I mean, come on. How can you not love an app that works around Cupertino’s pathological denial that the web is (at times) a valid medium for consuming content and uses their own system hooks to stop them from forcing you into an app that redisplays that same content also using web technologies?*
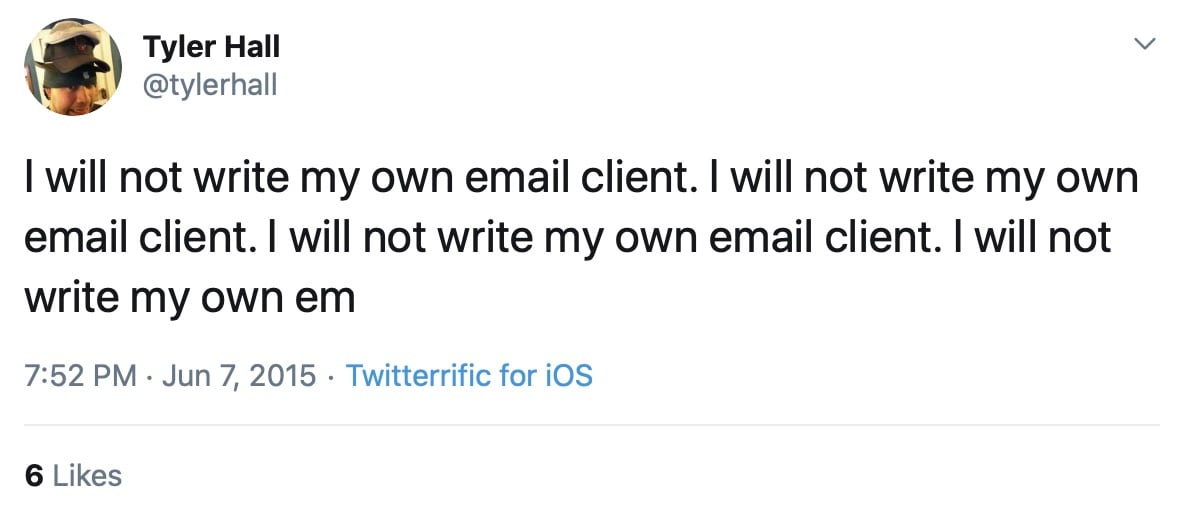
I think my tweet-rant describes the problem well enough, but just in case you’re not convinced. Look at the magical user experience that happens now that Associated Domains have been brought to macOS. Here’s a video of me – right now – editing this blog post. I wanted to re-visit my tweet that I linked above, so, naturally, I clicked the link in my literal text editor and…
it bypasses my browser and opens the goddamn Twitter app instead.
_sigh_
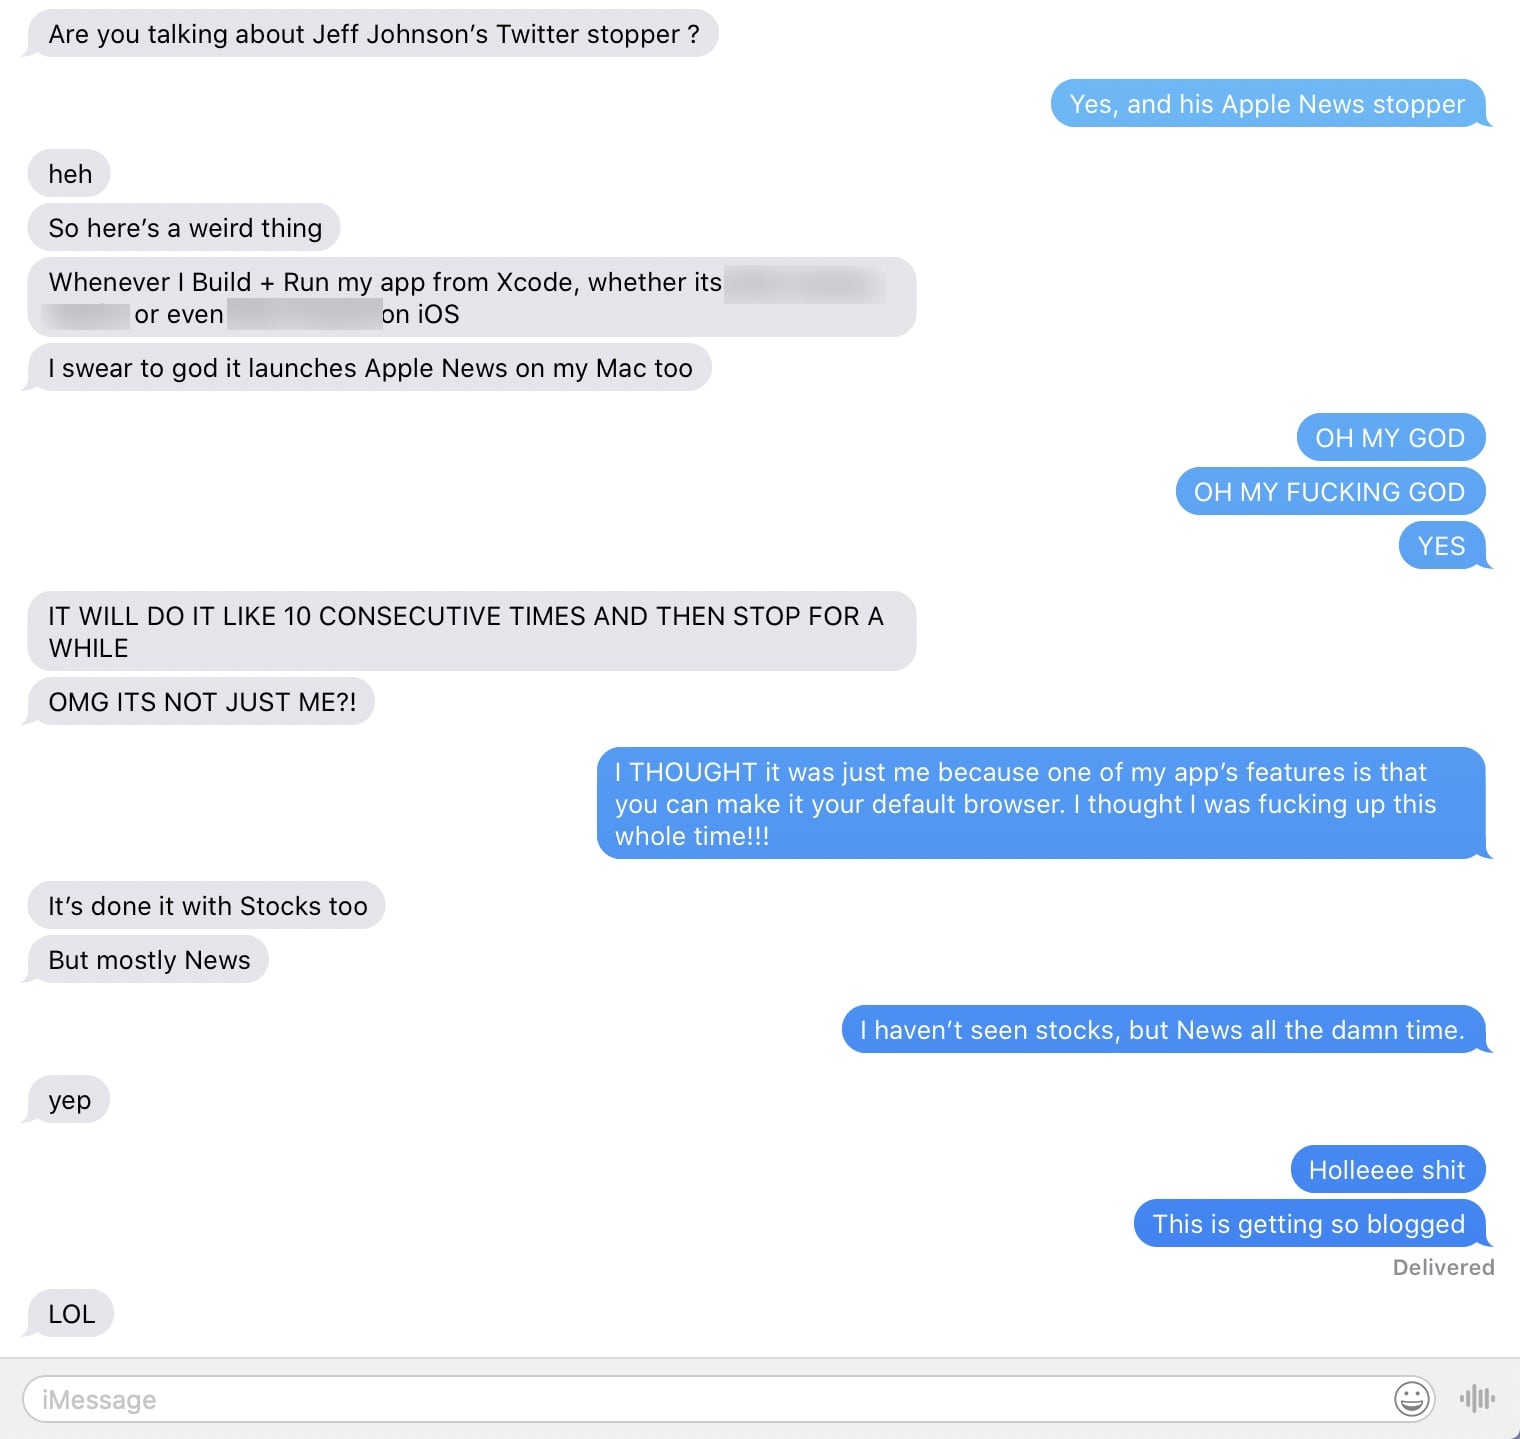
Oh my goodness. I was very close to wrapping up this post just now when a developer friend messaged me:
That’s one of those bizarre bugs that are, in fact, so bizarre you can’t even tell if they’re really happening or if it’s just you the user (or you the developer) screwing something up. Even when you see it happen over and over again for months. You still don’t file a radar because you can’t reproduce it or even be sure it’s a legitimate issue. But, wow. Finally having confirmation that it’s not just you? That’s a great feeling.
Right. Ok.
The end of this post went off the rails and turned into an unintentional rant. That wasn’t my goal.
My point is go give Jeff’s apps a try. They’re clever. Well made. And solve a real experience problem that I know many of us face. He’s a solo developer doing good work for all the like-minded Apple customers out there.
I’m now going to go file that bug report.
If the Apple News apps are not actually complicated wrappers around a webview, I would love to be told otherwise and will gladly retract my snarky statement and post a correction. I know they’re Catalyst amalgamations, of course, but I still assumed WKWebView was underneath it all.
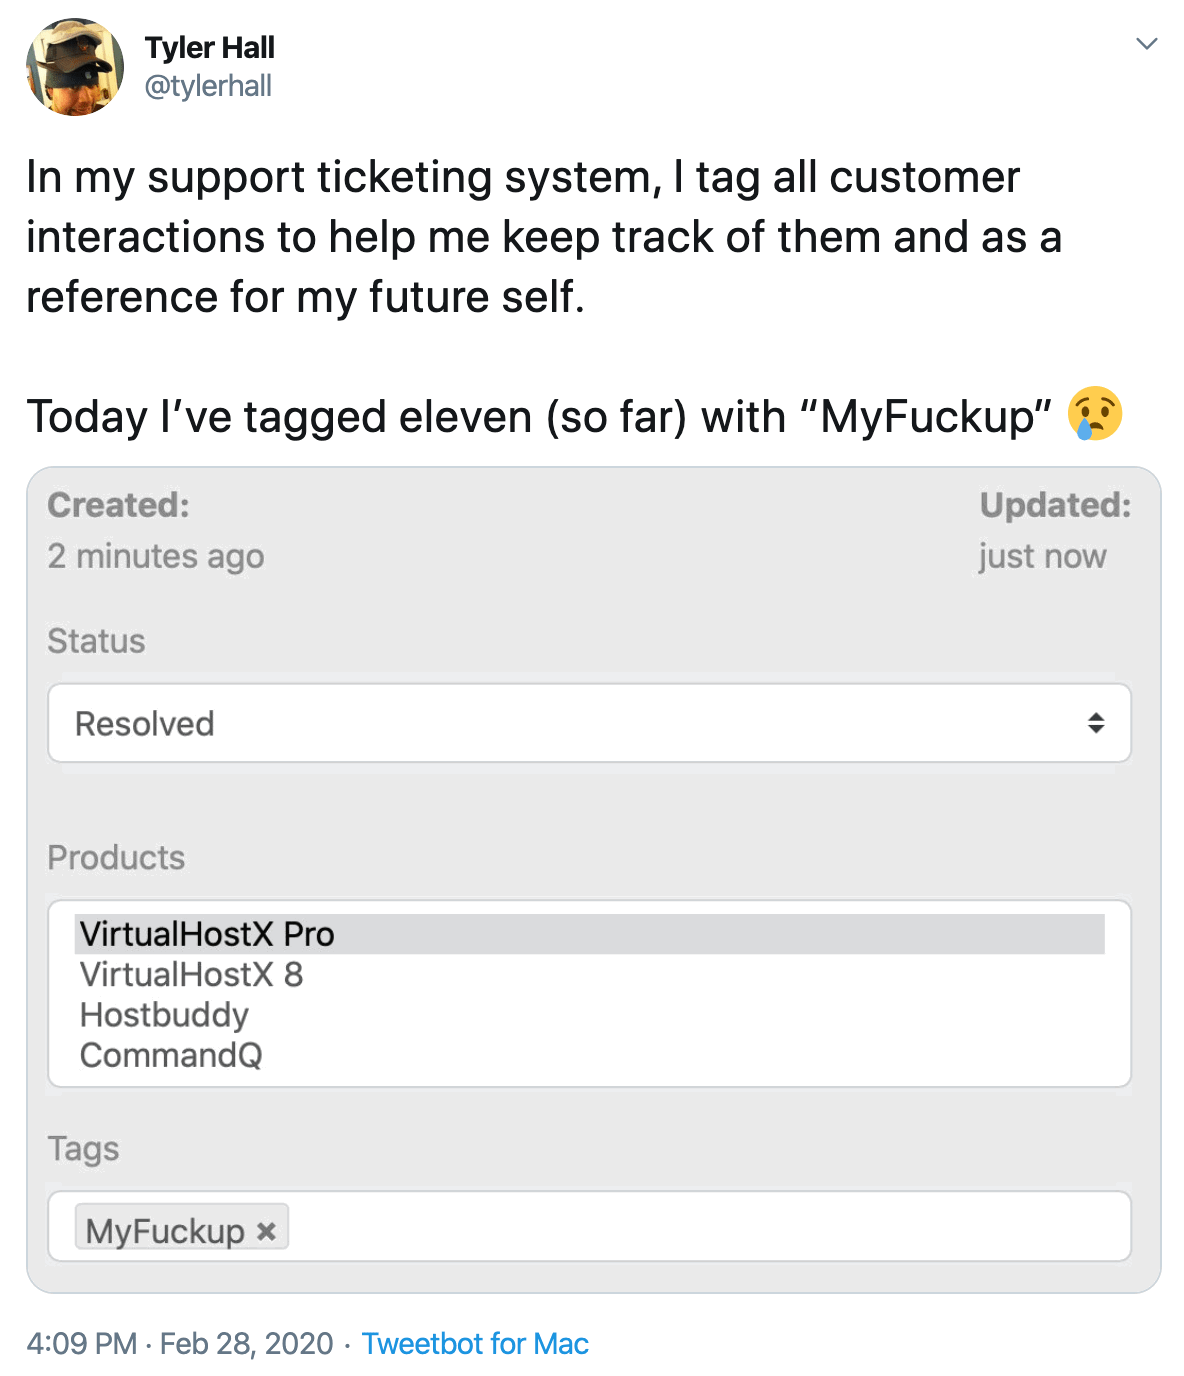
I received a ton of great feedback from visitors about my MailMate love-fest earlier this month. Most people didn’t know the app existed. So, here’s a few more details around how I have my setup configured along with the hidden preferences I’ve enabled.
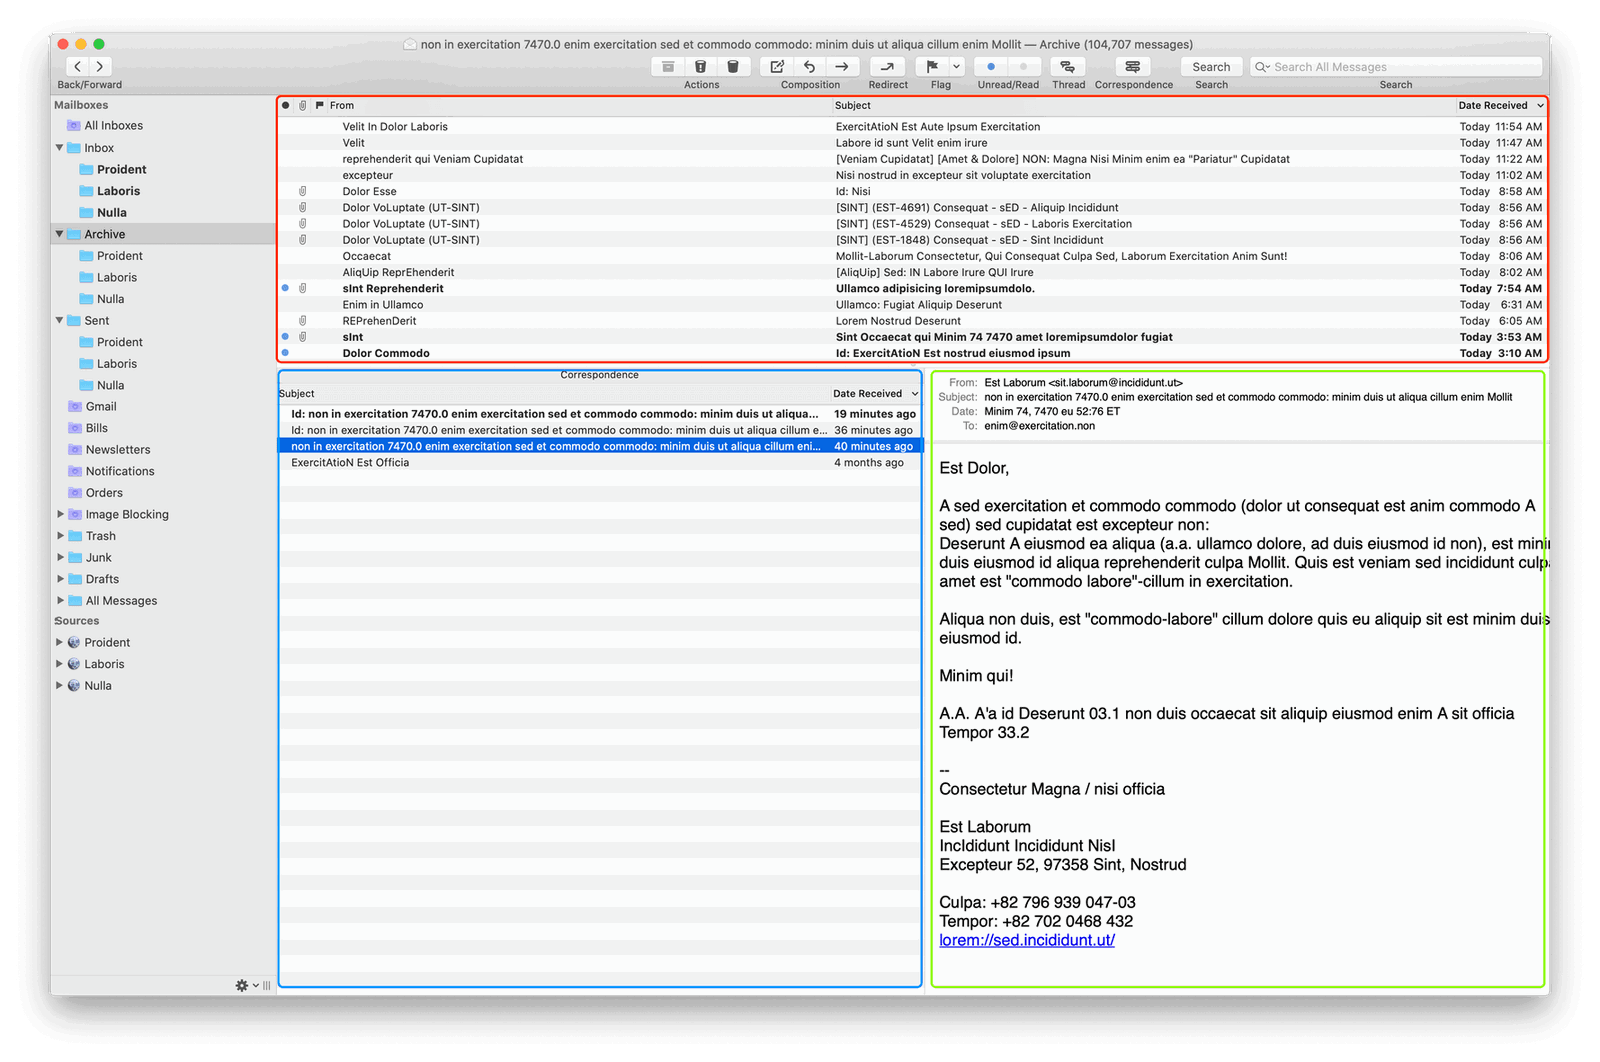
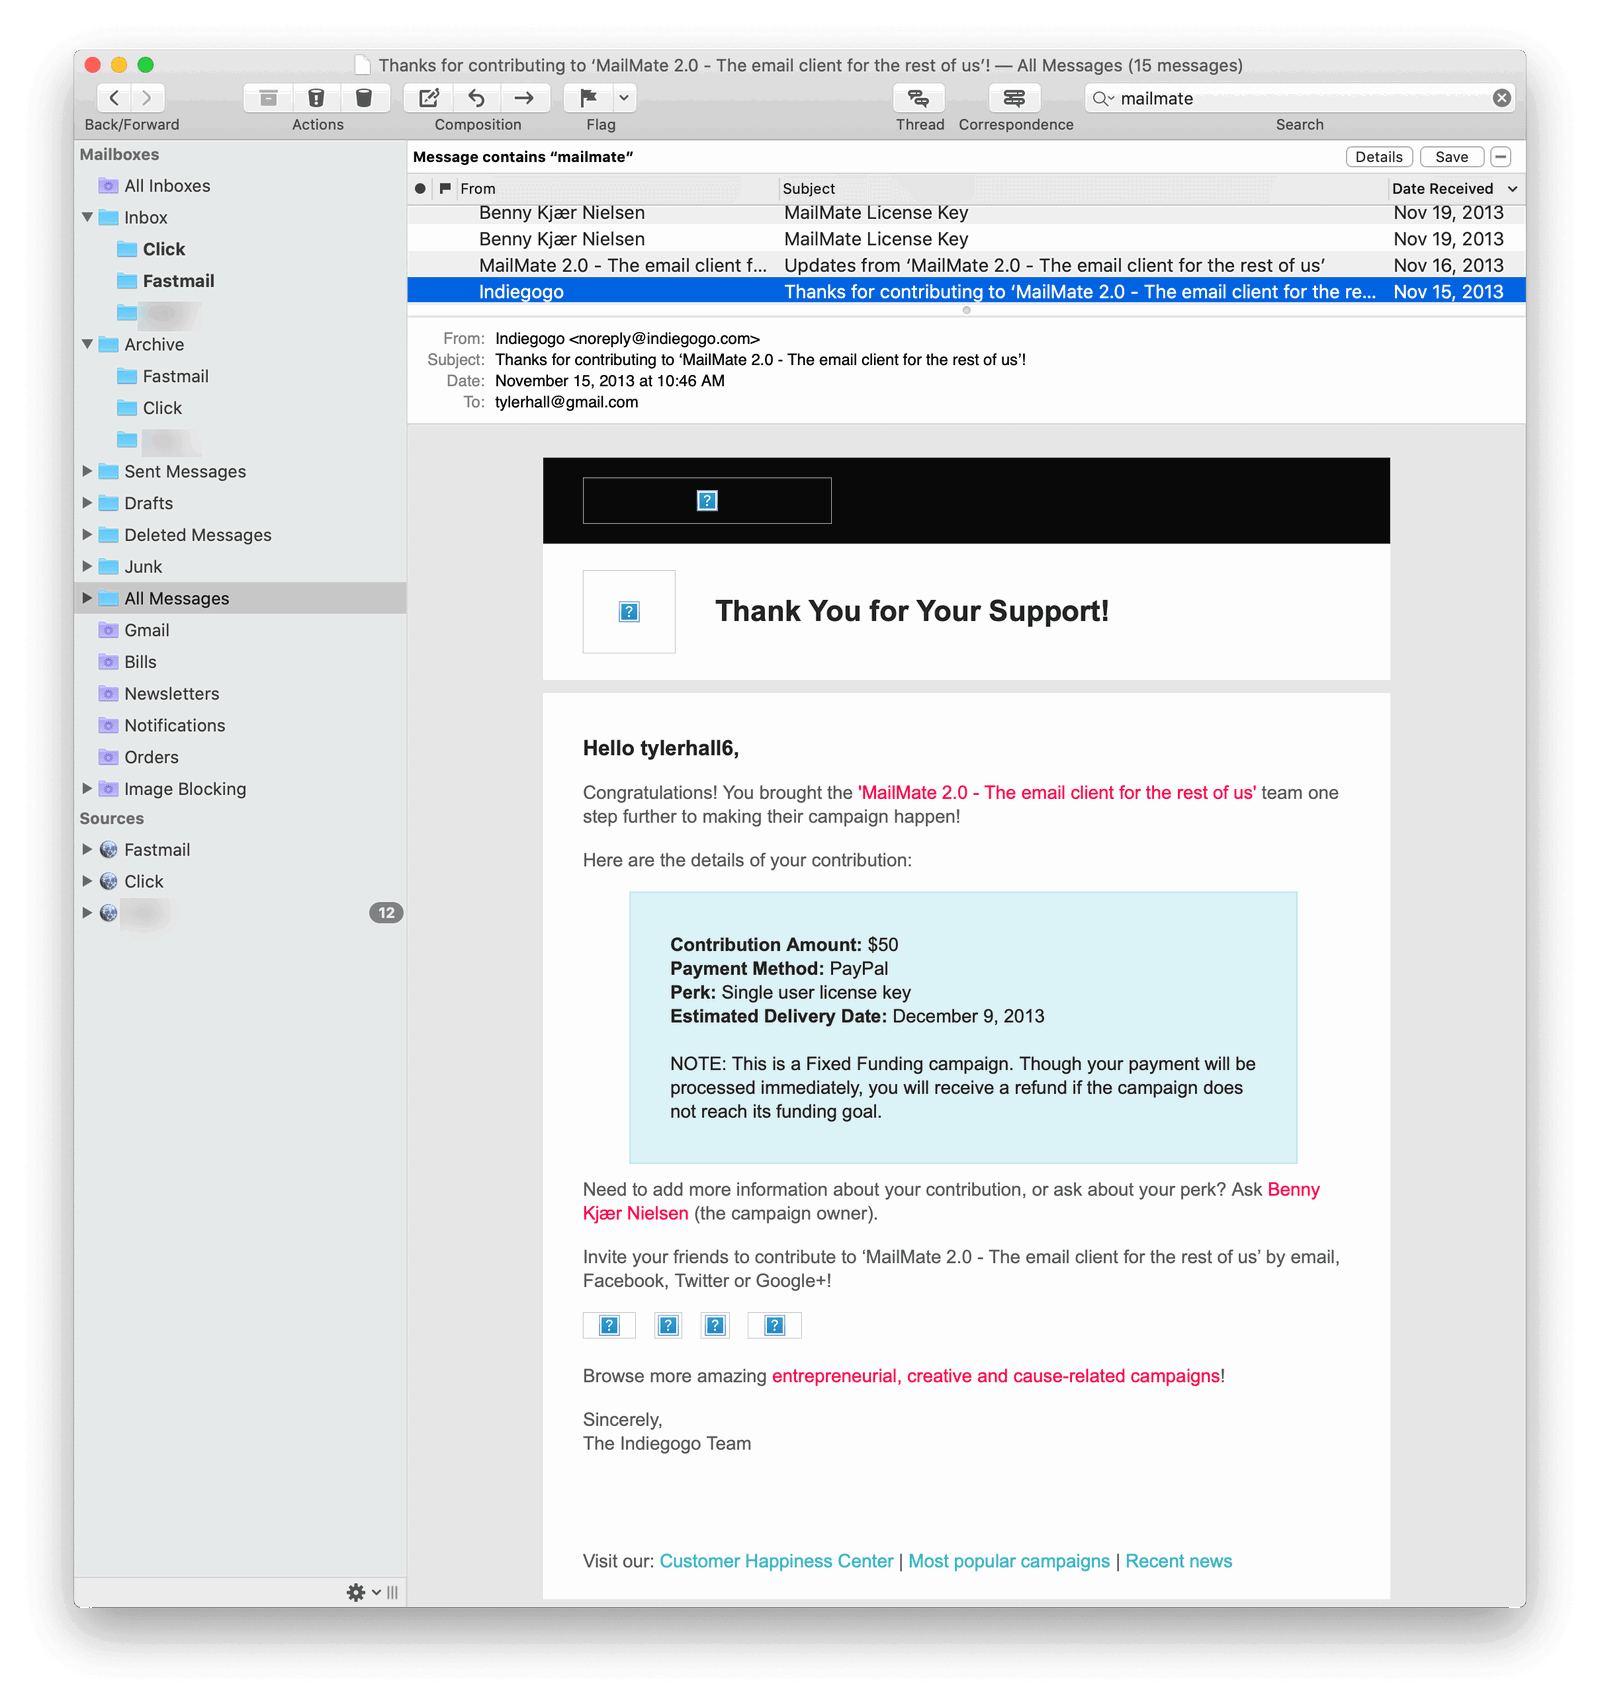
Here’s my copy of MailMate:
On the left is your typical macOS source list with all of my mailboxes and smart folders. I’ll describe those later. But first, the three-pane main view.
At the top, outlined in red, is the message list. When Gmail came on the scene in 2004 and introduced email threading to the masses, it was a revelation. And I stuck with a threaded inbox view even after I switched my personal email account to Fastmail.
But maybe a year ago? I was digging through my archives trying to find a specific conversation with a customer, and I found it easier to do my research when I reverted back to a standard, chronological list of my messages. After fifteen years of only looking at threaded conversations, this “new” view just sort of…stuck? And it’s been my default MailMate view ever since.
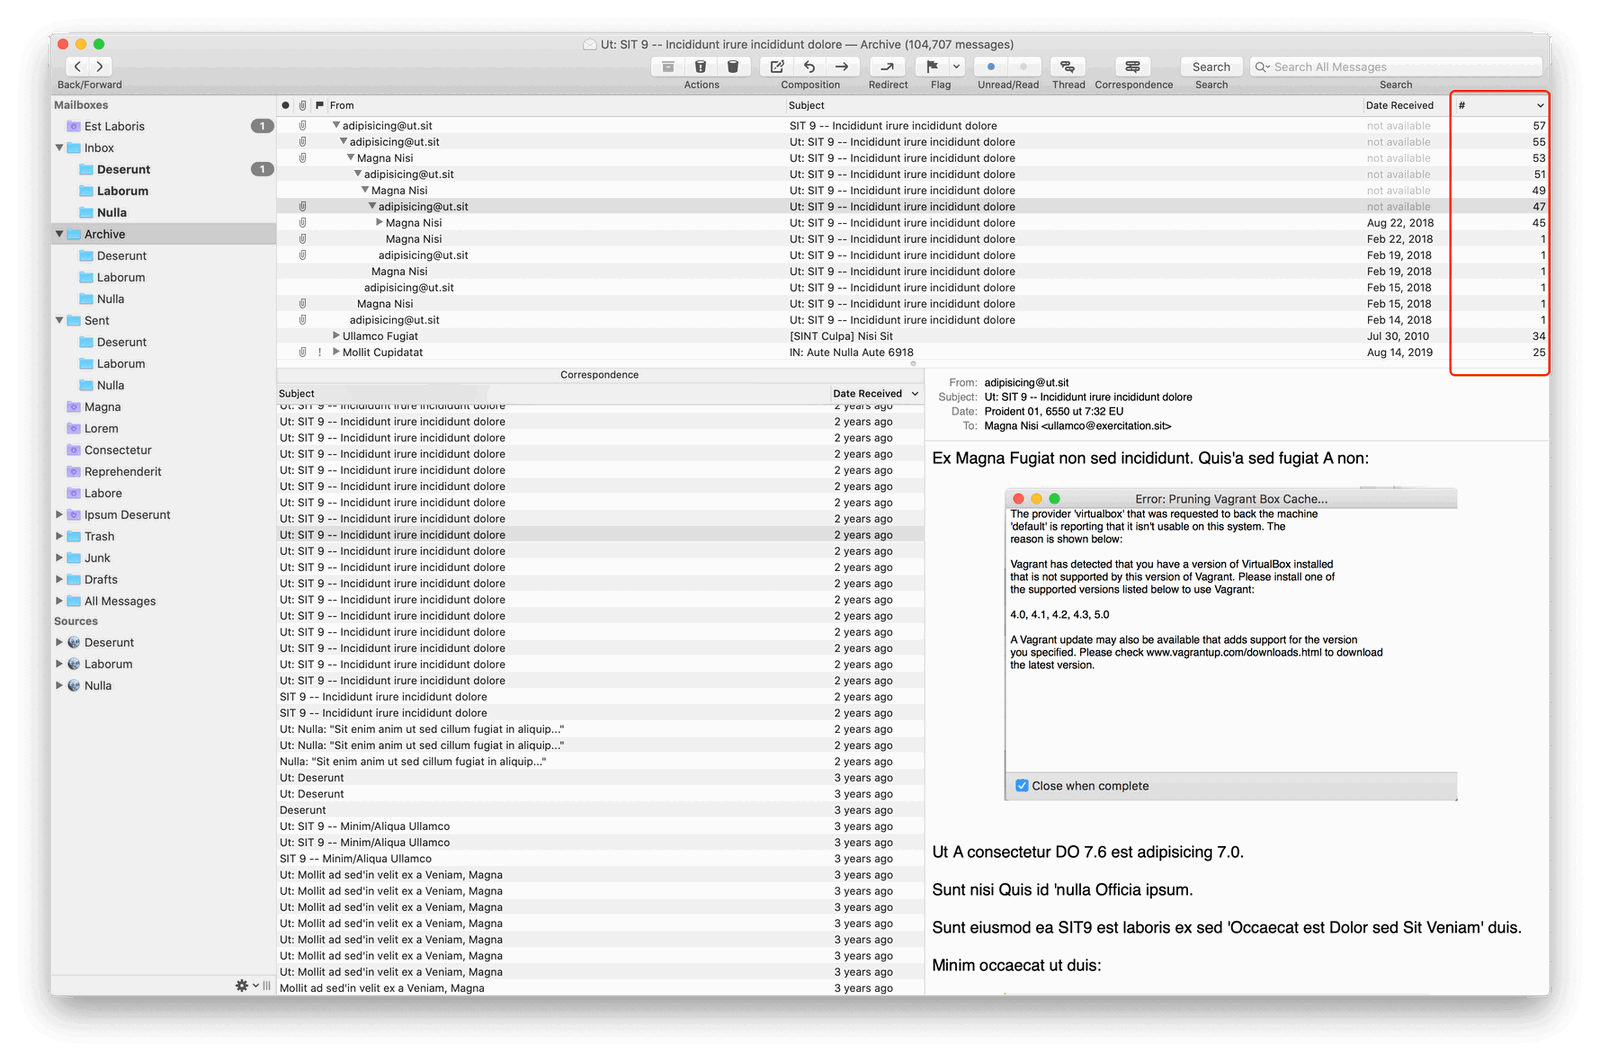
Don’t get me wrong, MailMate has excellent support for organizing by threads. It even offers an amazing feature I’ve never seen in any other email client – showing the total number of messages in a thread and then allowing you to sort by that count. For example, here’s my threaded customer support archives sorted by longest conversation.
The right-most column shows the number of emails in each thread. Apparently one customer and I exchanged 57 replies!
Going back to the first screenshot, the bottom area outlined in green is the currently selected email. Even though MailMate is optimized for sending plain text (and HTML using Markdown) emails, it renders HTML messages just as well as any other client. Unlike most iOS email apps I’ve tried (as well as a good number of macOS apps), I’ve never encountered any significant HTML rendering bugs – even from the most ridiculously formatted mailing lists or advertisements.
As I said above, I prefer a chronological inbox with one email per row. However, I do find it incredibly helpful to see – at a glance – previous correspondence with the sender. All modern email clients offer threads, which is great, but MailMate offers an instant correspondence view (what I call a “history” view) that shows every email you’ve ever exchanged with that person – regardless if it’s part of the current conversation. And that’s the area outlined in blue.
I have a pretty good memory for my customers, but I find it invaluable to instantly see previous conversations I’ve had when someone reports a bug or has a question. The correspondence view also (accidentally) gives me an ad-hoc view into their order history. Because I bcc myself on every order receipt and serial number lookup, when I select their support email, the history view shows an email for every order they’ve placed, etc. It’s a crazy-useful feature.
Next up, the sidebar.
Inboxes are inboxes, so I’ll skip those. But the purple folders are smart mailboxes. And MailMate has by-far the smartest and most powerful search and filtering capabilities of any email client I’ve used. Here are the four main smart folders I’ve added to my top-level view:
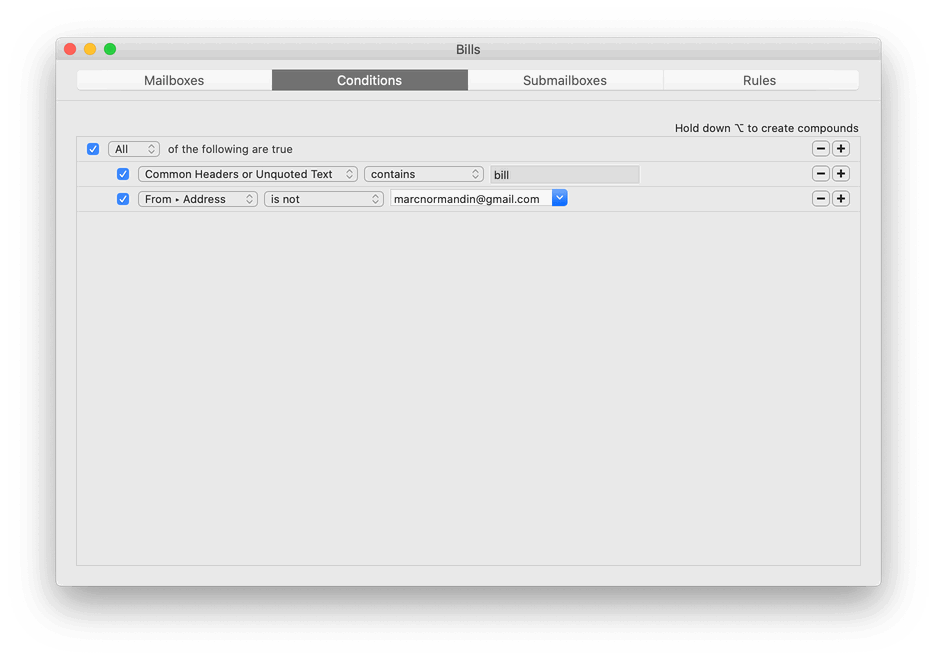
Bills
This mailbox simply searches for the word “bill” in the subject or body of the email. I know, that’s a stupid simple rule. But, it works!
Newsletters
I have a secret email address that I only use for subscribing to newsletters and mailing lists that I actually want to read. This smart mailbox filters on that as well as for a number of From: senders that I signed up for long ago before I started using a dedicated newsletter email address.
I really like having all of these emails organized into a single view. I get too many to read everything. But, when I have time, I can quickly dip into the recent stream of updates and then jump back out – almost like a lower priority and less urgent RSS reader.
Notifications
I mentioned above that every email my backend system sends to a customer is automatically BCC‘d to me just so I can keep an eye on things. For branding reasons, many of those emails come from different addresses based on what product they’re concerning or the reason for the email. This mailbox has smart rules defined to collect all of those.
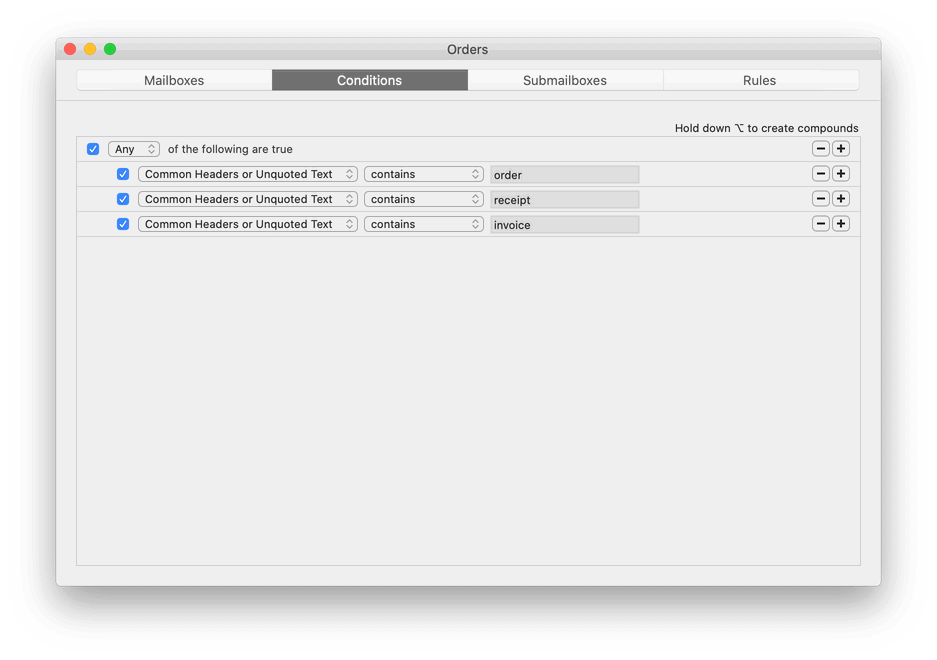
Orders and Receipts
Finally, my Orders mailbox gathers all online orders, receipts, etc. It does this by searching for the keywords “order”, “receipt”, and “invoice”.
Again, it’s a really simple search to setup, but it works wonderfully for my needs.
MailMail Hidden Preferences
The MailMate manual has an entire section on hidden preferences that aren’t exposed through the GUI. Feel free to read through everything that’s available. Some of them are so useful, but also so esoteric, that I keep an updated shell script in Dropbox with all of my customizations that I can re-run if I ever need to setup a new computer.
I keep my Dock resized to be pretty small on screen, and I find the default badge sizes hard to read when I’m leaning back from my screen. Bumping up the font size is a nice touch for my fast-approaching-forty eyes.
Attachments Up Top
I never understood why MailMate defaults to showing an email’s list of attachments at the bottom of the message – offscreen if the message has to scroll. This bool makes them up appear at the top of the message view.
Close Window after Move
Does just what it says. If you’re viewing an email in a separate window, when you file away the message into a folder, MailMate will also close the extra window.
Give Composer Initial Focus
When you set this preference, pressing ⌘N to create a new email will focus the body of the message so you can begin typing right away – as opposed to focusing the To field.
So that’s a bit more about my MailMate setup. There’s a ton of additional tweaks, customizations, and power features you can set to bend the app exactly to your liking.
To my future self ten years from now: this post is for you.
Late last year I shipped the biggest update to my flagship app in its thirteen year history. If you’re not familiar with the app or my tiny software company, don’t worry about it. Those details aren’t important.
In my announcement to my customer mailing list, I promised that more important than the immediately available updates, was that this release laid the groundwork for many more significant future improvements and new features. I even went so far as to make the biggest mistake a developer can make: I promised a ship date for the next round of improvements.
The reason I put that date out there was because I felt guilty. Despite this release being the culmination of nearly a year’s worth of work – and an insane seventy-one hours spent coding during the final four days leading up to the Black Friday launch, I still felt like it wasn’t enough.
So I basically said “Upgrade today, and I’ll deliver even more in forty-five days”.
That deadline came and went in mid-January. Sure, I’ve shipped eight app updates since then, but they’ve all been minor releases. Bug fixes and some nice improvements, plus a bit of polish. But certainly not what I was aiming for.
I’m happy to say, though, that now I’m finally in the home stretch of delivering that first big round of improvements that all of 2019’s foundational changes made possible. It’s not complete yet, but I can see the end goal.
But that’s not the point.
Getting to the Point
The above 250 words were just to provide context for the rest of this post.
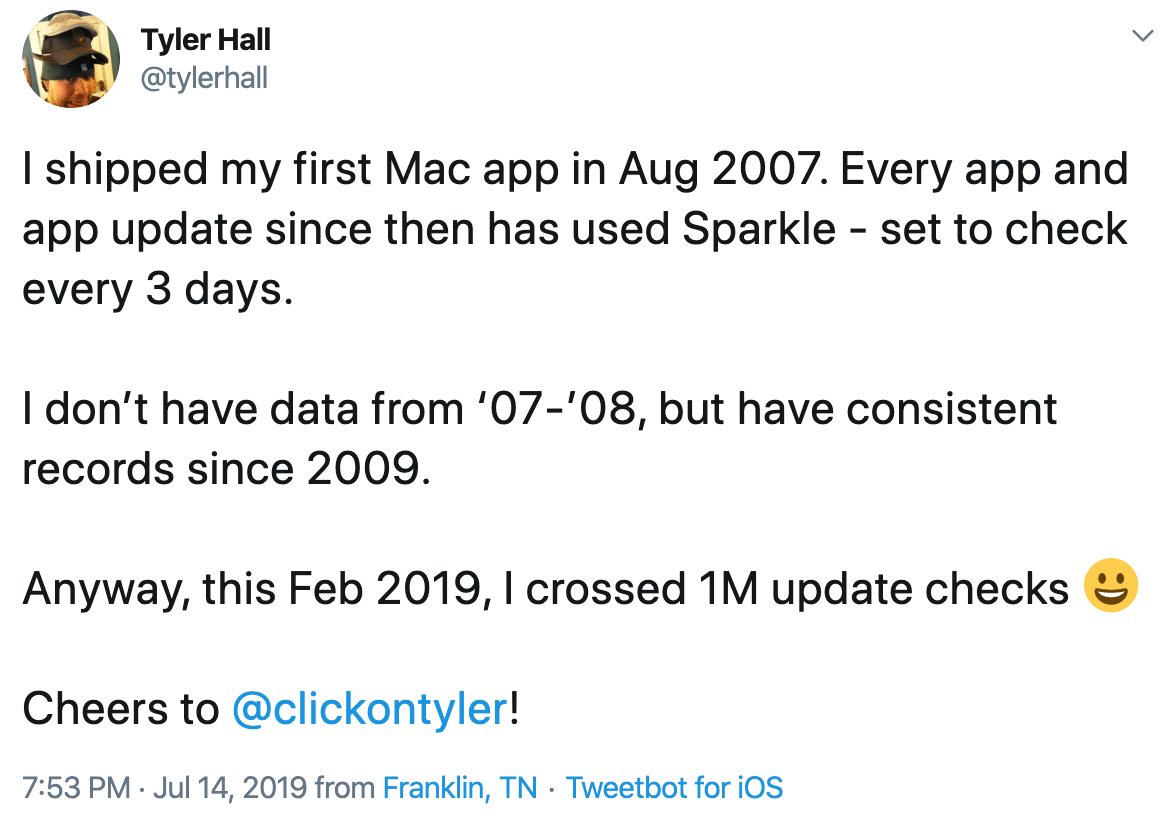
Since August 27, 2007, my little app has seen
142 releases
2,200 commits (that I’m aware of)
and the currently shipping version has 54,501 lines of code (according to SLOCCount).
And despite all that work, all of those updates, and all of the bug fixes and new features they contained across thirteen years, there is a single, twelve year-old ticket that I’ve never closed.
Call it a bug. Call it a new feature or an improvement. Whatever. But it relates to a critical piece of my app’s infrastructure that literally allows the app to do its job. (I’m purposely being vague about the technical details because I don’t want them to be the focus of this post.)
My current way of making things work is an incredible hack that relies on a system framework deprecated in OS X 10.8. Over the years, I’ve migrated to slightly different (but not really better) approaches, but they’ve all been stopgaps, half-measures, and so very clearly the wrong way of doing things.
And it’s remained that way because I’ve been afraid.
Obviously the focus of my career has been building for Apple’s platforms, but I’ve worked with so many different tech stacks, languages and frameworks over that time. And for the most part, I’ve been fortunate enough to get up to speed quickly and find success with each.
But always, always in the pit of my stomach, deep down in the back of my lizard brain, there’s this nagging voice when it comes to the low-level work, the real work, the type of code that real developers write
You’re not good enough. You can’t make it work. You’re not smart enough to figure it out.
So I keep punting on the work. I keep pushing that bug fix further and further out and just hope that my code keeps working and that a random macOS point release doesn’t bring it all crashing down.
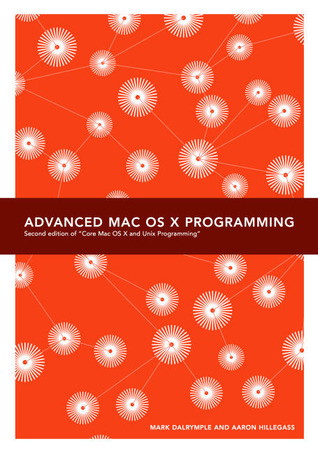
I’ve made a few false starts at writing the code the correct way. I first learned Objective-C and the Cocoa frameworks from the Hillegass book seventeen years ago.
And then shortly after moving to Cupertino in 2007, I vividly remember browsing the computer books section in the Barnes & Noble on Stevens Creek Blvd and finding this:
I bought it, and took it back to the economy, extended-stay hotel I was living in and spent the evening browsing through every topic.
I don’t know why I was so in awe of the book. It may have simply been that it was titled Advanced Mac OS X Programming. Or maybe just that so much of what it covered was so far above my head at the time.
But then, right there in the middle of that book, was a section on the right way to approach the problem I’m still struggling with in my app today. (Well, what was the right way back then. Things have changed, but the new APIs are in a similar ballpark.)
So it hasn’t been that I’ve been unaware of what to do for the past decade and a half. I’ve mostly known how to go about solving the issue. And as I’ve dug into the sample code I’ve been able to find online over the years, I’ve built a mental model of how all the pieces fit together, but the technical underpinnings still elude me.
And I guess that’s OK. That’s the point of system frameworks and APIs, right? To an extent, they’re made available to paper over the low level details and give developers an easier interface to work with.
But there’s just something about this particular stack and area of the system that has become a permanent roadblock in my head. It’s so far outside of my expertise that my normal willingness to dive in and learn something new takes a back seat and is blocked by fear, worry, guilt, shame, and so many other awful unnamed emotions that whenever I even think about attempting to work on this feature my self-confidence vanishes, I shut down, and turn to adjusting font sizes and margins to distract myself into feeling better.
For me at least, it’s my ultimate expression of imposter syndrome.
And goddamn it sucks.
Light
But.
I have a deadline.
Not just a self-imposed release date, but an actual contractual obligation to get all the work I’ve been focused on since the last big release in November done, tested, and shipped next month.
The third week of May is going to be a huge opportunity to reach a new market and acquire new customers. And I want to put my best foot forward. The app is feature complete as far as the new stuff I want to ship. My focus now and over the next seven to ten days is smoothing out the workflow of the app and just making it better and easier – especially for new customers. It needs to Just Work.
And so two nights ago I sat down in my office. And just fucking did it. I told myself “no” was not an acceptable answer and dove into every arcane, unmaintained bit of Apple documentation I could find. Searched old Cocoa mailing lists for sample code, and finally, finally have a working solution.
For forty-eight hours, I was knee-deep in UNIX sockets and C code, exercising programming muscles that I haven’t flexed since I was an undergrad almost twenty years ago.
What I’ve built is nothing novel. It’s exactly the same solution that every other system-level Mac app or utility is using.
The difference though, is that after thirteen years I finally got past my own shit and mental demons and made it happen. I guess I was just fed up with myself constantly ducking out of doing the hard work. That, plus a looming deadline I have to meet, finally held my feet to the fire on this particular feature in a way that has never been done before.
I reached the light at the end of this particular tunnel. So many features. So many bug fixes. Thousands of customer emails and replies. Brainstorming sessions. UI mockups on the back of napkins at bars or doodling on a notepad while at my real job. But this one damn bug was always out of reach. And now it’s done.
So, to my future self ten years from now and anyone else reading this post, I’ll leave you with this picture.
I don’t know where that picture came from or who originally made it. My former therapist gave it to me six years ago. I printed it out, and it’s been hanging on the wall above my desk ever since. I need to remember to look at it more often.
I keep looking through my archives of old, private coding projects – the ones that I built just for myself to solve a particular need – to see if I can find any that other folks might find useful. So, here’s another one I spent a few hours cleaning up recently.
Fastmail is the greatest email service in the world. (Fight me.) I assume they picked that name at random because it sounded nice and then kind of painted themselves into a corner and were forced to live up to it by making their IMAP backend literally the fastest email service I’ve ever used. If you think IMAP is just a broken and awful protocol (it is), then you’ve probably only ever tried Gmail’s horrible, bastardized implementation in recent years. Fastmail IMAP absolutely sings.
And their web interface (particularly the latest revision) is truly spectacular and also lives up to their name. It’s hands down one of the best non-trivial web apps I’ve ever had the pleasure of using.
So, despite primarily living in MailMate, I did build this simple macOS wrapper around fastmail.com a while back and occasionally do still use it over MailMate.
The app supports
Multiple Fastmail accounts.
Native macOS notifications (and sounds).
Customizable Dock icon badges.
Keyboard shortcuts (⌘1 – ⌘9) to quickly open specific accounts.
Never, ever does anything with your Fastmail credentials. The only network traffic is between the app and the Fastmail website.
It also has the dumbest macOS Preferences window ever for configuring your accounts because I’m too lazy to spend an evening doing it the right way.
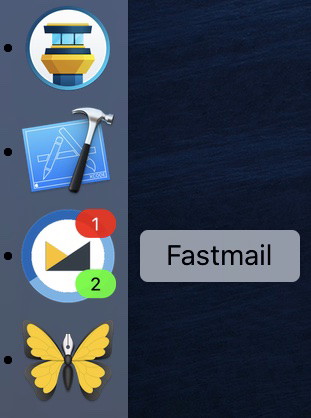
I’d post screenshots showing what the app looks like, but I’m not going to because 1) it’s literally just fastmail.com inside a window and 2) I don’t want the internet to see my Inbox.
Instead, here’s the app’s Dock icon showing multiple unread badges.
You can assign each account’s unread count to a specific corner of the Dock icon. If you assign multiple accounts to the same corner, their counts will be summed together and displayed.
Of note: the app monitors your inbox for new messages by injecting JavaScript into the webview. Early on I realized that if you navigate away from certain screens within fastmail.com, the JavaScript will break. (Obviously, because the DOM elements it’s looking for are no longer available.)
To fix this, I did the first and most incredibly hackish thing that came to mind, which is to keep a hidden webview open in the background that the app maintains control over and can parse for new messages.
I would like to fix this by doing smarter DOM scraping, but I don’t think it’s worth the effort because the HTML source can change at anytime.
Rather, if someone would like to tackle this feature for me, it would be amazing if the app just spoofed the website’s JMAP credentials and checked for new email the real way.
Anyway, I hope all you handsome Fastmail customers out there find this little project useful.
If there’s one thing I’m good at, it’s reinventing wheels. So here’s Roland – an open source, blog-aware, static website generator written in Swift that also uses PHP under the hood because PHP is still the best template language.
You’re probably thinking to yourself
Oh, god. Why?
You’re probably also asking
Isn’t “blog-aware, static website generator” literally the purpose of Jekyll?
I’ll answer those questions and many more below. But first, here’s why I moved this blog off WordPress for the first time in thirteen years. (Other than two months last Summer when I experimented with Ghost.)
Why leave WordPress?
First of all, WordPress is great. If you want to build a personal website – or maybe even a company website – just use it. It’s a capable, featureful, well-maintained, open source success story that is stewarded by an amazing team. But I kept running up against two problems.
Control
Performance
I’m an old-school web nerd who likes to maintain complete control over my website – from the design down to the raw HTML. And despite twenty years of experience with PHP, every time I looked under-the-hood to see how WordPress worked or to tinker with a plugin, the coding style and way things were organized gave me hives. (That’s not meant to be real criticism. What Automattic has built is awesome. I’ll certainly never create anything that rivals WordPress.) It’s just to say that years ago I gave up attempting to work within the lower layers of their framework and turned to using plugins for everything.
Of course plugins present their own problems – namely, I’d lose control over the HTML being generated and when and where all the various scripts and static assets were injected. It just made everything a mess. Sure, for a while I used a completely custom template that prevented plugins from doing anything on their own unless I allowed it, but then that defeats the purpose of using plugins at all.
And then the more plugins you install, the slower WordPress becomes – and it’s already not that fast to begin with. For ten years, this blog was hosted on the same VPS as my business website and mostly worked fine. But every now and then I’d get a spike in traffic and the server would fall over. (For reference: a 4GB / 2 CPU VPS with Linode.)
I’d take the necessary precautions like using WP Super Cache, keeping all static assets offsite on a CDN, and an unexpectedly popular blog post would still bring things crashing down. If it were just this dumb blog, I wouldn’t care. But it would also take down my online store with it, which costs me money and annoys my customers.
So a year ago I moved this blog to its own DigitalOcean droplet and even took the time to (finally) setup Varnish in front of it. It’s been great having it isolated from all of my other web properties, but a Hacker News or Daring Fireball link will still cripple it. The only thing that has truly worked for those traffic spikes has been to also put Cloudflare in front. And that’s great, kudos to them for the amazing free service, but that means holy crap I’ve got three caching layers (not counting my CDN) where new posts, edits to existing posts, and template changes can get hung up.
Yes, yes. The droplet this blog is (was) running on was DigitalOcean’s lowest-tier $5/month box, so I’m well aware of what I was paying for. But I’m not willing to pay (a lot) more just to support an occasional burst in traffic – at least not when I think there are other ways to find a solution. There are some wonderful, dedicated WordPress hosts out there that I’ve worked with for client websites in the past. But even with WP Engine, I would have blown past their $115/month plan five months in the last calendar year.
So the idea of moving to a static website that can withstand bursts of traffic has been percolating in the back of my head for a few months now.
I’m perpetually afraid to touch any of the software on my server for fear of breaking Jekyll’s dependencies. I’m sure it was my fault, but at one point I was unable to do a build of my company website after an unattended Ubuntu security update broke something related to Jekyll and Redcarpet and Kramdown. It took me two weeks of off an on tinkering before I could get back to a working state.
Jekyll is written in Ruby, which is so, so far removed from the ecosystems I normally work in that I don’t even know where to start when something goes wrong.
So I crossed Jekyll off my list. The next obvious choice seemed to be Hugo. Everyone who has ever mentioned Hugo to me has raved about how wonderful it is. And my surface-level investigations into the framework seemed to confirm that. But, again, like Ruby, Go is not a native language for me. And switching would also mean having to learn an entirely new template system as well.
And, hey! I know Swift (mostly). That solves concern #3 above. And being a Mac and iOS developer, I feel pretty confident about being able to resolve any build or dependency issues that come up, so that fixes #2 as well. I guess that means I just need to look into how easily I can use Publish to generate the traditional blog-style website I’m going for.
But, first. What is a traditional blog?
For me, that means the type of personal websites (née web logs) that I came of age reading in late high school and early college. A home page with a reverse-chronological list of entries that you can then click through to read the author’s post history. Every post can also appear within dedicated category archives and date-based archives (typically by month).
It’s a simple, classic structure geared towards content that requires more attention than a tweet.
And reading the Publish documentation and examples leads me to think it would be possible to build. But then I got to the section on theming, which uses Plot.
Plot enables you to write HTML using native, fully compiled Swift code, by modeling the HTML5 standard’s various elements as Swift APIs. The result is a very lightweight DSL that lets you build complete web pages in a highly expressive way.
The first example on the Plot project page is:
let html = HTML(
    .head(
        .title("My website"),
        .stylesheet("styles.css")
    ),
    .body(
        .div(
            .h1("My website"),
            .p("Writing HTML in Swift is pretty great!")
        )
    )
)
Technically impressive? Absolutely. Type-safe? Both intriguing and appealing. But just, no. Gonna nope right out of there.
I love the foolishness, malleability, hackability, and pragmatism of HTML. And hats off to John if he can make a framework like Plot work for him – maybe I’m just not taking enough time to fully understand the benefits – but I ran screaming when I saw that’s how you theme your website in Publish.
Wheel, meet your new inventor
But the idea of using Swift as the engine of the static generator – if not the templating language – really piqued my interest. So, over the course of a long weekend, fueled by a healthy dose of not invented here syndrome, I decided to take a stab at writing my own system. My calculus being
If I can knock this out in a weekend, that will be faster than the time it would otherwise take to learn the ins-and-outs of another framework. And while whatever I come up with is guaranteed to not be as robust or flexible as a Hugo or Jekyll, it is guaranteed to meet my needs without compromising on the design or structure of the website.
But let’s be honest. It also sounds like a whole lot of fun for an old web nerd like myself.
So, that’s why I built Roland. And if you’re reading this post, that means the DNS switch was successful and everything you see was generated by the roland command line tool, dumped into git, and sent to Netlify for static hosting – and sped up by the amazing folks at BunnyCDN.
One command to run against a folder of web assets and build a website – just like Jekyll.
Fast enough to be useable during a typical edit → compile → test workflow session.
Clear separation between the Swift business logic that dictates the site’s structure and the layout of the HTML.
A flexible templating system.
Simple
Unlike Sundell’s Publish project, I didn’t want every website I build with my framework to be tightly coupled with the Swift code that generates the HTML output. His is a unique approach, but not for me. I like the Jekyll method, which is a simple command line tool you pass a folder of source files (Markdown, HTML, images, other static assets) and it outputs your generated web site.
Performance
One of Hugo‘s biggest selling points is how damn fast it can build your website. Their website claims, on average, \< 1ms per generated page. I have no hopes of achieving compilation times like that. Instead, I just want my tool to be performant enough to where I don’t hate my life every time I make a copy change or tweak my website’s theme.
This blog has over 200 posts – written in Markdown. And then when you add in pages for categories, monthly archives, and other static pages, it totals closer to 400 pages that need to be generated along with all of the other static website assets and over a decade’s worth of wp-content uploads. Here’s how a full build works on my laptop:
36 seconds.
Yes, that’s definitely not fast. It’s on the order of 10 pages/second. I know Hugo would be way more performant. I don’t know for sure how it compares to Jekyll, but clickontyler.com – with considerably less pages to build – still takes a full 9 seconds. So I feel like 36 seconds for a website of this size is likely in a similar ballpark.
(Roland was written in a mad dash over three days, so I know there are many places that can be optimized. Again, my initial goal was for it to be useable – optimizations can come later.)
That said, there’s no way in hell I’d wait that long between every build when I’m iterating on basic HTML changes. So, roland has a number of command line options that lets you specify exactly which parts of your website to build or not build.
USAGE: roland [--config ] [--output ] [--posts] [--pages] [--home] [--dates] [--categories] [--rss] [--no-public] [--no-clean]

OPTIONS:
  -c, --config      The build configuration .plist to use.
        If omitted, "config.plist" in the current directory will be used.
  -o, --output
                          The build output directory.
        If omitted, "_www" in the current directory will be used.
        If the output directory does not exist, it will be created.
  --posts                 Only build posts.
  --pages                 Only build pages.
  --home                  Only build home archives.
  --dates                 Only build date archives.
  --categories            Only build category archives.
  --rss                   Only build RSS feed.
  --no-public             Don't copy "_public" directory.
        If set, the contents of the "_public" directory will not be copied into the output directory.
  --no-clean              Don't clean the output directory.
        If set, the contents of the outpupt directory will not be deleted prior to building.
  -h, --help              Show help information.
The content of your website is written in Markdown, while the HTML templates are, uh, HTML.
Static, one-off web pages are placed in the _pages directory. The format of a page looks like:
title: About
path: about/index.html
---
[Tyler Hall](https://twitter.com/tylerhall) is a Mac, iOS, and (former) web developer from Nashville, TN.

After spending three years as an engineer working for Yahoo! in San Francisco, I'm now working on my own apps under my tiny software development company, [Click On Tyler](https://clickontyler.com). We make productivity software for web developers and designers. Our flagship apps, [VirtualHostX](https://clickontyler.com/virtualhostx/), [Hostbuddy](https://clickontyler.com/hostbuddy/), and [Hobo](https://clickontyler.com/hobo/), are loved by over fifty-thousand web developers.

You can stalk me further on [Twitter](https://twitter.com/tylerhall), [GitHub](https://github.com/tylerhall), and [LinkedIn](https://www.linkedin.com/in/tylerhall). Here's a small collection of my [past projects](/portfolio/) - both commercial and open source - as well as [what I'm currently working on]({{site_BaseURL}}now/).
The front matter of the page is loosely based on what Jekyll does. The only required properties are title and path. You can add additional info (one per line) and those key value pairs will be made available to Swift and the template language for you to do something with.
Blog posts are similarly stored in _posts and look like:
title: MailMate
date: 2020-04-06 11:48:18
slug: mailmate
categories: macOS,Reviews,Apps,Favorite Things
---
MailMate is a glorious, configurable, ultimate-nerd-dream of an email client built just for macOS. I use it every day in conjunction with Fastmail and SaneBox to give me email super powers.

But the killer feature? It just fucking works.

And believe me. I've tried every single email client for Mac and iOS – paid apps, free apps, subscription apps, apps from small companies, and apps from giant corporations.

I don't know what else to say except that I love this app so much. And unless I'm horribly mistaken and there is secretly a giant corporation hiding behind MailMate and slurping up all of my private data, MailMate is built by a single developer, which is even more awe inspiring.
---
It took me a few days longer than I had hoped to get started, but here's the first post in a new [Favorite Things](https://tyler.io/category/favorite-things/) category celebrating [#IndieSupportWeeks](https://mobile.twitter.com/search?q=(%23IndieSupportWeeks)). First up, is the incomparable [MailMate](https://freron.com) by [Benny Kjær Nielsen](https://freron.com/about/). It's "the email client for the rest of us".
The front matter requires a title, slug and date. (path is not a thing because it is automatically derived by your blog’s naming structure as you’ll see later.) categories are optional and are a comma delimited list. Category names may contain spaces and other special characters. Only commas are not allowed.
The next section (after the ---) is an optional post excerpt that may be used in your templates. If you don’t want to provide an explicit excerpt, you can leave it blank.
Everything after the second --- is the post’s body written in Markdown according to the CommonMark spec. (HTML is allowed to be interspersed within the Markdown.)
The contents of the _public directory will be copied verbatim into your chosen output folder. This is where you’d store your images, stylesheets, JavaScript, etc.
Flexible Templates
Finally, the HTML templates that are used to built your website are in the _templates folder.
I can hear what you’re thinking.
PHP?
That’s right. I realized early on that I’d need at least some minimal templating language to build the design I wanted. I couldn’t (didn’t want to) put all that logic in Swift. I certainly had no intentions of writing my own templating language, so I turned to Google and found Ink (also by John Sundell!), Tuxedo, and Stencil.
The last three days have been a bit of a blur building Roland, so I may have my wires crossed. But the reason I didn’t stick with any of those projects – even after getting proof of concepts working with all three – was they ranged from being a little too inflexible with how sub-templates were included to being really, really slow. I’m talking on the order of 1 second per page to generate. And I also realized that no matter how advanced or how much effort their authors put into the syntax and features of their template language, it would never be as flexible and powerful as…
PHP.
So, yes, Roland uses PHP to render your templates. I’ve long thought this and my work this weekend once again confirmed it for me, but PHP has always been the ultimate templating language for the web. I feel like every other template language I’ve ever used has always boiled down to a less-capable subset of PHP’s features aimed at people who don’t want to use a programming language. And that’s totally cool. There’s definitely use cases for that. But as a long-time PHP developer, I wanted the ease of use and power that a real language affords.
So, Roland (by way of Swift) runs your templates through the system PHP binary and outputs the results. It even allows for full use of include statements so you can structure your templates any way you want.
And while I realize how insane doing it this way may seem, Roland injects the data for your posts, pages, website metadata, and configuration settings into PHP’s global scope, so that your templates can use all that information to render your website exactly as you want. Doing that live on a real web server would be nuts. But this is all pre-compiled and saved statically to disk ahead of time. When served to your visitors, there’s no PHP being executed. So the security (and performance) implications aren’t a thing.
Here’s a sample template that renders the page for an individual post.
The post’s properties like title, date, permalink, content, etc. are exposed natively to PHP like $post_title. You can easily create dynamic layouts by doing things like
<?PHP if(isset($post_previous_post_id)) : ?>
to decide if a link to the next post should be shown or not.
Having all of this data available to each page and exposed to PHP means I can finally make some interesting choices and optimizations that I’ve long been putting off because it would have otherwise meant mucking around with WordPress plugins. For example, all of the video content for this blog is hosted with BunnyCDN and played with VideoJS. Unfortunately, even minified, the JavaScript and stylesheets for rendering video are my largest static assets. But now, at build time, I only include those assets in the HTML on pages that specifically contain video elements. If a visitor browses this blog and never encounters a page with video on it (which is the vast majority), then that’s an additional 350 KB they don’t need to download. That’s nothing on a modern connection. But on mobile? Every byte adds up.
Miscellany
Categories
I mentioned earlier that categories are placed in the post’s front matter. That works fine, but it doesn’t allow you to define a hierarchy of categories – just a flat list.
So, Roland will look for a categories.txt file in your project directory that allows you to define parent categories and subcategories.
The first category on each line is a parent. Any additional, comma delimited catogries that follow the parent on the same line will become children.
I’m not overly thrilled with the dumbness of how that file is structured, but, hey, it solves the problem for now.
Global Settings
And because I’m an Apple developer, the global configuration settings for your website are stored in a .plist file.
This contains settings such as
Base URL of the website
Title of the website
Posts per page
Whether or not to show post excerpts or the full post on every page
etc.
You can also define your own custom key pairs which are exposed to your templates in PHP. For example, I’ve added
My CDN’s base URL which is prefixed in front of all static assets
Default post author
Title of the generated RSS feed
etc.
By default, when you run roland, it will look for config.plist to build your website.
But you can also include multiple property lists – one for testing locally, another with settings for a staging server, and one for production. Then, just tell roland which one to use at build time using the --config flag like
roland --config production.plist
Project Status
As I’ve said a few times now, Roland was built over a three-day weekend. It’s pretty opinionated in the type of website it will currently output – namely, a blog.
I don’t overly love the way the Swift side of things is structured. Don’t get me wrong, it totally works! (For my purposes.) But there’s certainly some tidying and cleaning up to do. I also want to make it a bit more general purpose so I can move clickontyler.com off Jekyll in the near future as well. Overall, I consider it a first draft.
I’d love any feedback folks can offer. Jekyll is the only real-life experience I’ve had with static website generators and has obviously influenced how I approached this project. On the other hand, maybe I’m just an idiot WordPress user and all of my pain points could have been avoided with one weird trick.
In any case, whether not it was worth the effort to build Roland from a technical point of view is certainly up for debate. But it sure was a fun distraction to hack away on. And it feels amazing to finally have complete control over my primary web presence.
It took me a few days longer than I had hoped to get started, but here’s the first post in a new Favorite Things category celebrating #IndieSupportWeeks.
First up, is the incomparable MailMate by Benny Kjær Nielsen. It’s “the email client for the rest of us”.
Anyone out there remember Email init? Which then became Letters.app? It was a project started by Brent in January 2010 to be
an email client that actually meets the needs of developers and professionals who rely on email, folks who type for a living.
If memory serves, and if Twitter would get their dumb act together and just show me this timeline in damn-chronological-not-algorithm-optimized-order, it looks like Gruber took over leading the project along with Gus as technical lead. (And Brent being the honorary drink-buying chairman.)
I’m not sure when exactly the project died. The last tweet was February 23 of that same year. And the last real web mention about the project I’ve been able to find is Brent doing a mighty good deed by auctioning off the domain name for App Camp For Girls.
We can all dream about what could have been: a truly Mac-native email client for power users. Or, you could just use MailMate right now.
MailMate is a glorious, configurable, ultimate-nerd-dream of an email client built just for macOS. I first discovered it back in 2013 when Benny did an Indiegogo campaign to fund full-time development of the app. I was more than happy to throw in for a license key of my own to help keep the project moving forward.
I’m thrilled to say that six years later, MailMate is still going strong. I use it every day in conjunction with Fastmail and SaneBox to give me email super powers.
Why is MailMate so great? A lot of folks I’ve recommended it to (ok, forced upon, really) said “Eeeewwwww” when they tried it. And I’ll be the first to admit it’s not the prettiest app, but it does feel at home and serviceable on macOS. And then, of course, it does have a hell of a learning curve for an email client compared to most others. But the killer feature?
It just fucking works.
And believe me. I’ve tried every single email client for Mac and iOS – paid apps, free apps, subscription apps, apps from small companies, and apps from giant corporations. There are exceptions, of course, but most are mediocre. Nice to look at, a few clever features maybe, but they all almost universally fall apart when dealing with 15+ years of emails unless they rely on a server-side component to do the bulk of the work. And in 2020, is asking a piece of software to handle a few gigs of text and a ridiculously complicated networking protocol really that difficult?
So I have the utmost respect and amazement for just how incredible a job Benny has done with MailMate. In a single app, he has
Built the most stable email client I’ve ever used
Built the fastest email client I’ve ever used
Built the most powerful email client I’ve ever used
Built the nerdiest email client I’ve ever used
If you can just get past the initial configuration and learning curve and join the Religion of Plain Text Email Composition, you’ll find a desktop email app that wipes the floor with the usual competition.
The whole modus operandi of MailMate is its use of smart folders / searches / filters / etc for reading your email and plain text for composing messages.
MailMate only allows emails to be written using a plain text editor. It is important to understand that this is a feature of MailMate. It might even be its most defining feature.
Plain text is whatever text you can write with your keyboard. This means that you cannot visually emphasize words, create outlines, create links, and insert images within the text editor itself, for example, by clicking buttons. Instead, you can (optionally) use the simple Markdown syntax. This is then automatically converted by MailMate to HTML which is the (unofficial) standard for rich text emails. MailMate automatically shows you a preview of the email and this is what most recipients of your emails are going to see.
I’ve always been a nerd about the emails I write and have adamantly refused to send HTML email unless absolutely necessary. I totally understand the need for businesses (like mine) to send styled advertisements (I hate it, but I get it), but for a normal person just writing emails there’s no need. Plain text FTW.
As for smart mailboxes
MailMate encourages the use of so-called “smart” mailboxes. These are virtual mailboxes which show messages which belong to a specified set of mailboxes and which match some set of conditions. When handling a new message in the Inbox, the basic decision to make is whether it should be archived or trashed. The rest should be handled by smart mailboxes.
And those conditions can be layered on-top of one another and combined with powerful search strings to create the perfect smart mailbox that you refer to frequently or just to help find a long lost email from a decade ago. Just look at this beautiful example from the help manual:
foo f !smith t (smith or joe)
This means:
Message contains "foo" and From does not contain "smith" and (To contains "smith" or "joe")
And as for searching and filtering by date, holy crap:
And just like best-of-breed Mac apps, MailMate supports a plethora of keyboard shortcuts that let you plow through and triage your email without reaching for the mouse. You can do the usual commands such as archive, flag, delete, mark as read, mark as junk, etc. But then you can also hit ⇧⌘M to bring up a filterable list of all your mailboxes and effortlessly move the current message (or messages). And ⌘T will similarly let you go to another mailbox.
And the keyboard shortcuts don’t stop there. You can also assign them to any of the plugins or 3rd party scripts you’ve installed.
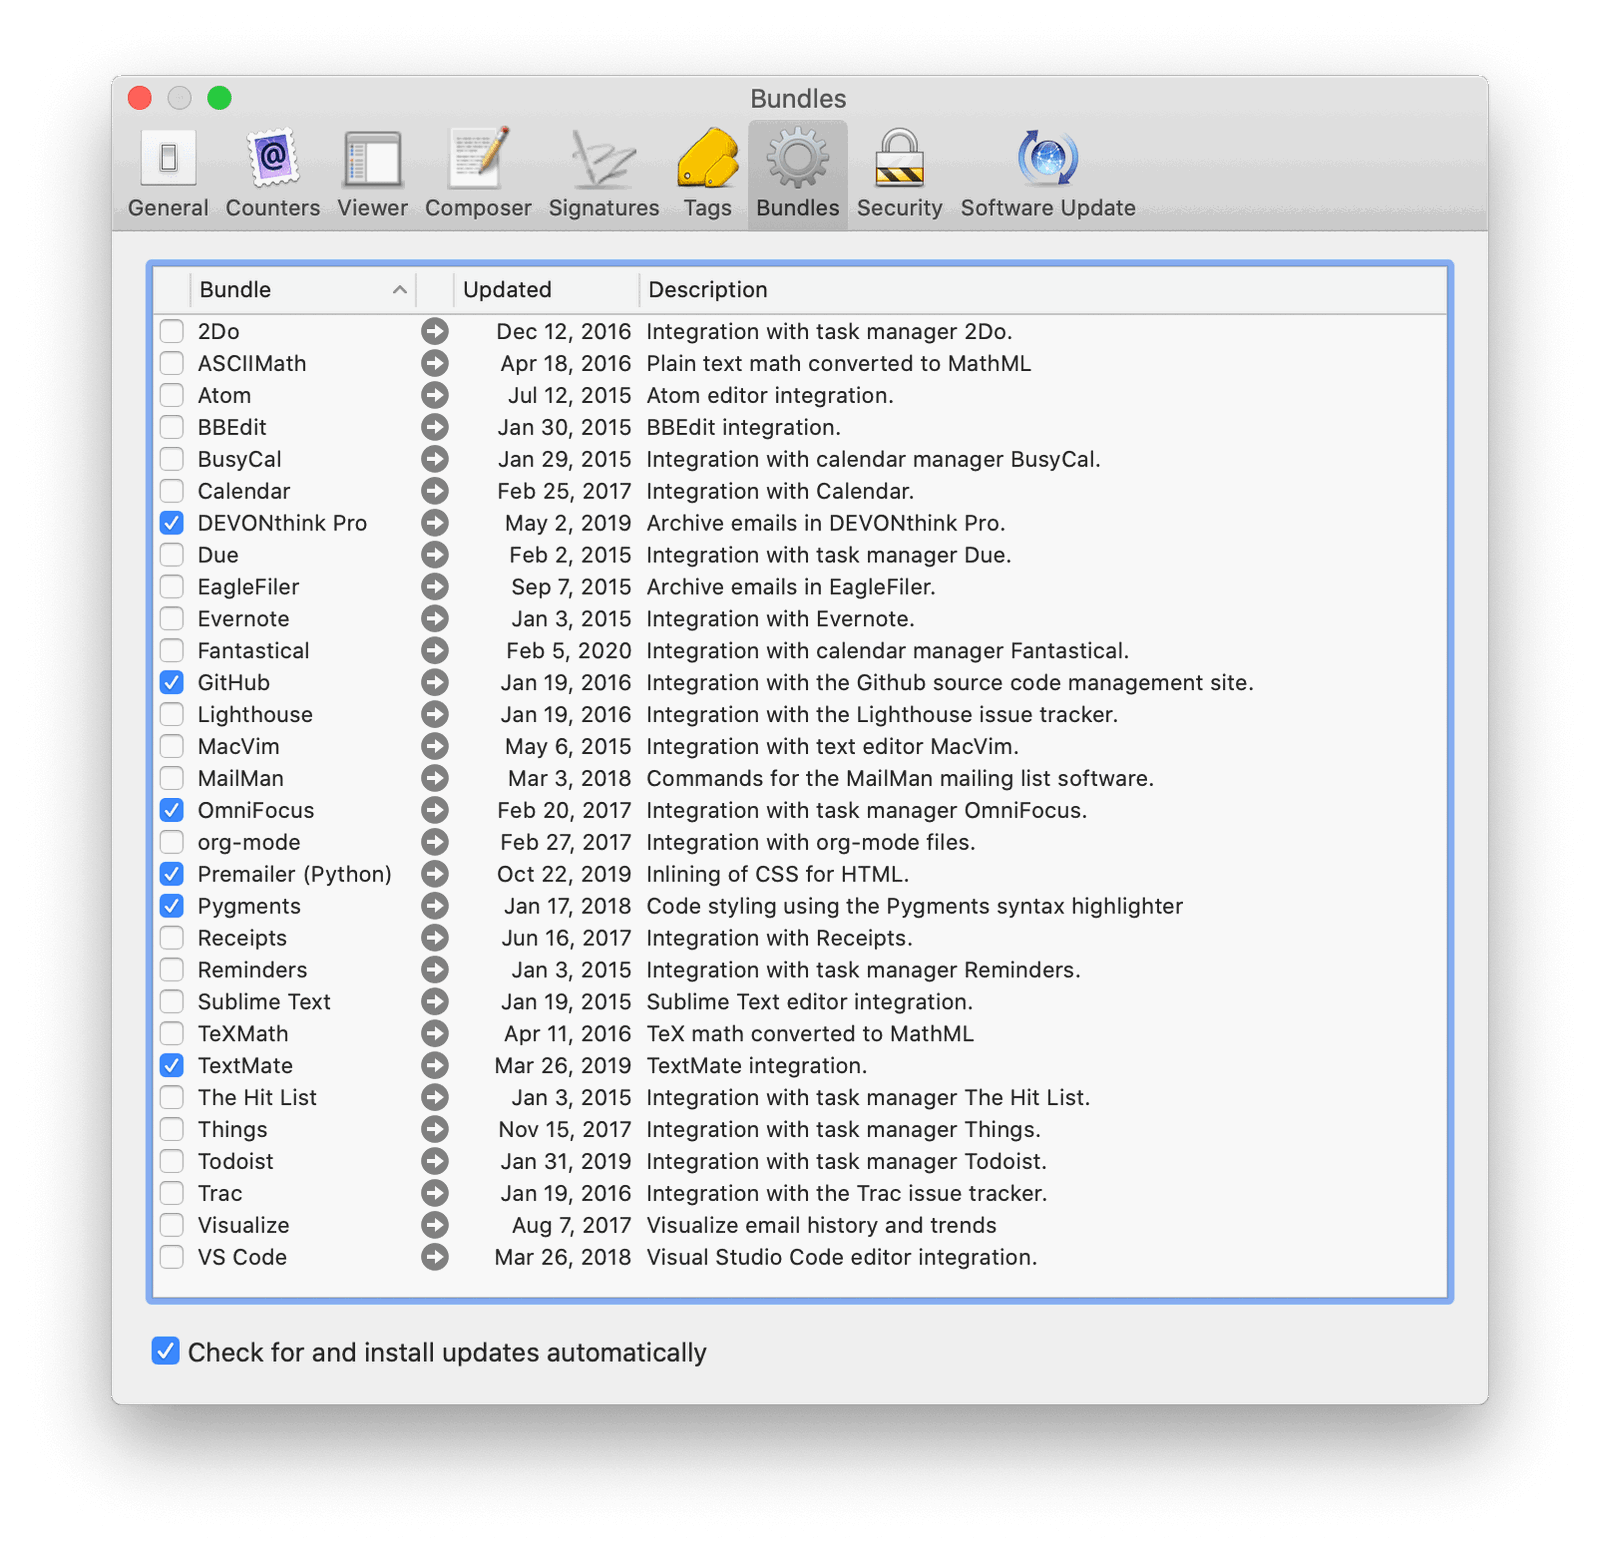
Whoa, whoa, whoa. Did I just say plugins and scripts? Yep, MailMate is wide open for you to run custom actions and perform tasks.
I’ve installed plugins for sending emails to OmniFocus as new tasks, archiving into DEVONthink, and editing replies with TextMate. I even wrote my own plugin that grabs the sender of the current email and opens a browser window showing me that customer’s order history and previous support requests in my backend system.
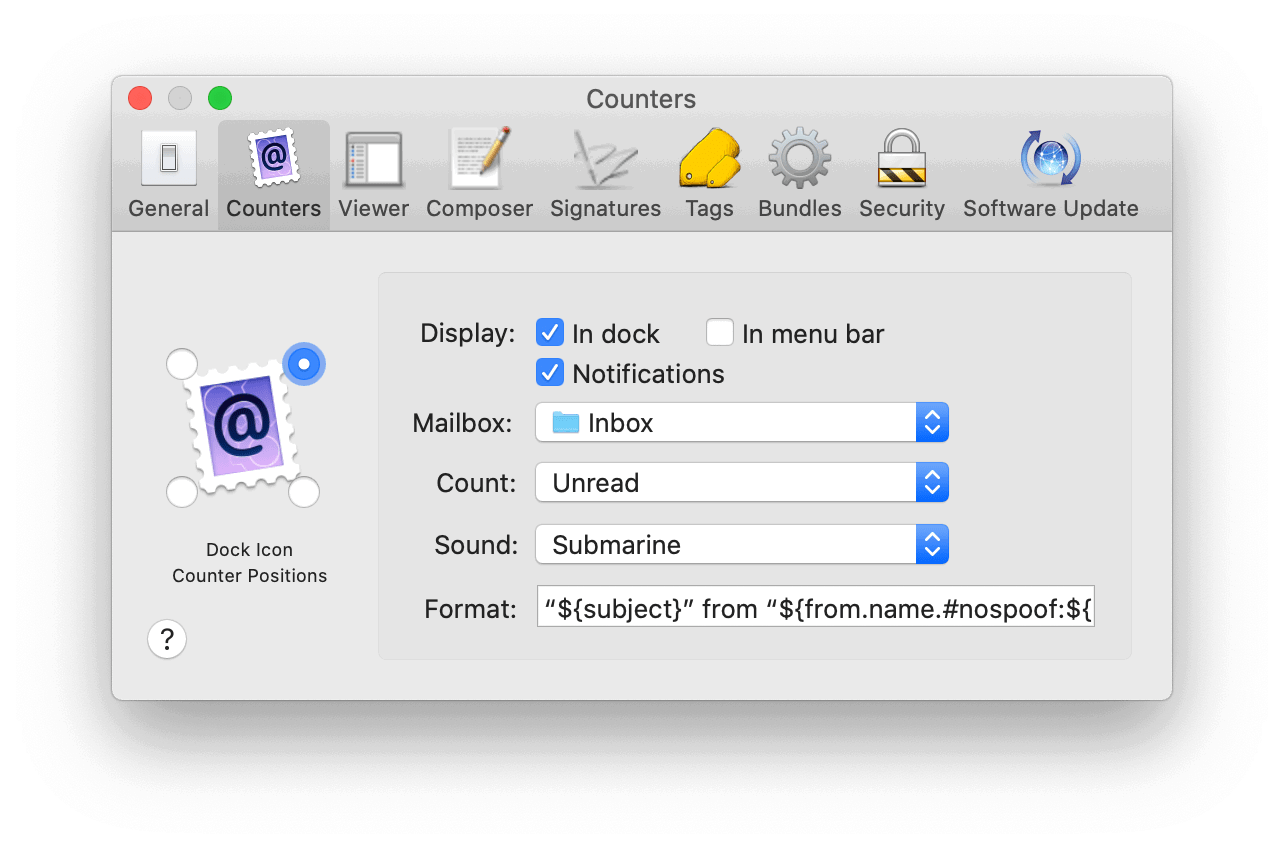
For each mailbox (not just account, but any mailbox) you can decide to show a Notification Center alert, a count in the menu bar, or a Dock badge. MailMate supports showing four different dock badges at once (one per corner). You can also choose what information is shown in Notification Center alerts and pick a custom sound. Or any of those in any combination.
I don’t know what else to say except that I love this app so much. And unless I’m horribly mistaken and there is secretly a giant corporation hiding behind MailMate and slurping up all of my private data, MailMate is built by a single developer, which is even more awe inspiring.
I try to keep this blog on topic. That being the business side of software development, or productivity, or the various ways I try to bend macOS to fit my odd workflows, or just griping about technology in general. My assumption is I’ve been writing about those topics here for thirteen years, and those of you kind enough to spend a few minutes with me every week keep coming back because they overlap your interests, too.
So, I do my best to keep other topics at bay – especially ones concerning the world outside our tech bubble. But at the same time, writing has always been therapeutic for me. It helps me organize my thoughts and stay centered. For the three or four hours I spend writing each week, the familiar pattern of brainstorm → write → edit → post → react lets me escape.
And we could all use an escape right now.
I’ve been working on a much larger piece recently. My working title for it is American Virus. It’s my take on the events shaping our new world in 2020, and why my country is attempting to out-America itself like never before. How my family is coping. How I see my friends (from a distance) dealing with life. And how technology blends into everything.
I don’t know if I’ll ever finish writing it or ever even post it. It just seems to get longer and longer each day as I think of more and more to add and document about this time period.
I think the most important thing is that I am writing. Number one, it’s good for me. And, number two, I think we should all be documenting our shared experiences. At some point in the future, it will be over – in one way or another.
And when the other side is reached, I hope we can look back on the things we did and how we were feeling in this moment and learn from that.
And so with no real conclusion in mind for a post that doesn’t really fit with the things I normally write about, I’ll just leave you with a link to the place where I do go to to write about stuff not made of ones and zeroes.
With all that’s going on in the world, it may not surprise folks to learn that small developers are starting to feel the economic crunch along with everyone else. In an email exchange I had earlier today, another owner of an indie software company told me:
It’s been an awful couple of months. [The city] is mostly locked down until May 4th. My kids look like they are going to be home for the foreseeable future. Their schools have gone full remote learning. So far, [my company] is weathering the storm. We have been giving out a few more complimentary extensions and refunds. But we have always given that to anyone that asks so it’s hard to see the change. How are you doing?
Their sentiments go on to echo what I’ve heard both publicly and privately from other folks in our little world of apps and services. I’m extraordinarily lucky that I have a full-time job (for now?) in addition to my app business. Don’t get me wrong – my app sales sure as hell help a whole lot, but I’m in a much better position to come out the other side of all this in one piece than folks who truly do depend on the whims of consumers for their 70% App Store cut.
…that I wanted to do something for our community’s indies.
Normally, this site (and all of my other work) is funded by sponsorships through non-tracking, privacy-focused (and JavaScript-free) ads that I run on a weekly basis. But for the next two weeks there will be no ads on this site. Instead, each day, I’ll promote a new indie app whose developer has been financially impacted by the current pandemic. For free, with no strings attached.
He’s taken it a step further than his own blog and started a GitHub project to coordinate the effort. The project has a growing list of folks helping out to promote our favorite indie apps. It’s a wonderful idea, and I’ve started brainstorming my own list of must-have apps from independent developers that I can’t wait to write about in the coming days and weeks.


